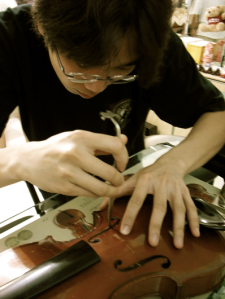
 For most of these string postings I write as an educator, but this time I write as an enthusiast. As a performer I always found it a little disappointing that most of us don’t have any skills in upkeeping our instrument, whether it’s carving a bridge, rehairing a bow, or setting a sound post. I used to take an entire trip to Chicago just to set my sound post for and after winter.
Recently I had a chance to learn about sound posts, and this particular write-up is both to share about the experience as well as to keep a record for my own reference, just as I recommend to all my students. A big thank-you to Gang Chong for sharing the knowledge to Teng Jian (pic, knocking the sound post to the left) and myself.
The first thing to know is the position of the sound post, and how sound changes. The lightened area denotes the said position:

It’s about 1-3mm behind from the bridge, and if I’m not mistaken, a similar distance inwards. Moving the soundpost a little towards the bridge (1) allows for a louder but somewhat harsher or more concentrated sound. Moving it away from the bridge (2) allows for a more mellow sound, but logically it can lose some volume and concentration. Moving the post towards the lower strings (3) or to the upper strings (4) adds more focus to those strings.
That’s a generalization though. Each instrument will react somewhat differently, and how and how well the sound post itself is carved is another factor. (The post is carved to fit the contour of the instrument, and the grain – the lines which show how the tree grew – should be 90 degrees to the grain of the instrument.) Experience and experimentation lead the way here.
The actual placement of the soundpost using a soundpost setter is much the same – a more practical experience that is challenging to put into words. However, some of the basics are:
a) The sound post is set at the bottom first, with the top angling away from you. Then the top of the post is pulled towards you.
b) If it is placed right, the sound post setter (the metal instrument used to position the sound post) is released on its own as part of the same movement used to put the top of the sound post in place.
c) One can (I suspect, especially in the early stages) set the post further inwards and then later pull it or knock it to the correct position. If one puts the soundpost too near the edge, then the post is naturally longer than it can fit in that area, and that can damage the instrument. If this happens, the wood near the sound hole will be raised – which acts as a warning sign.
Sound posts do not always need to be straight up: in some cases a slight angle may produce a better sound. However, the rule needs to be learned before it is broken, so one should aim to at least start with an upright sound post.
There is a method of looking from the scroll area into the sound hole in order to see whether the sound post is upright. However, a more reliable way – though more troublesome – is to look through the hole where the end pin holds the tailpiece.
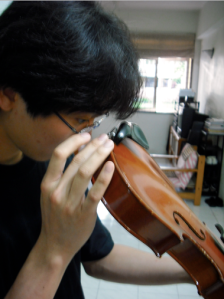
Here we can see that the soundpost is just slightly slanted to the left:
and we would use the sound post setter to knock it (see the picture at the top of the page), pull it or push to a more upright position. If it is not clear whether the post is slanted, there is a line inside the instrument where the neck is attached (to the left of our view above) that one can use as a guide. In pulling a sound post, it may be better to base a part of the hand on the instrument and use both hands, and wrist movements instead of the arm:
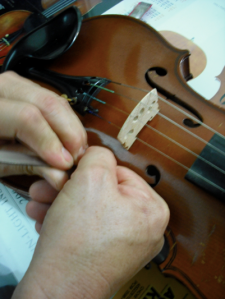
which is to prevent too much pressure being used – which would result in the post falling down.
The rest is just a matter of finding a setter and getting a cheap instrument to practice on – the setter has a tendency to scratch at the sides of the sound hole for beginners, and it has been suggested that a tube can be used around the setter, though that (I’m guessing) may make the setter slightly bulkier and more challenging to use. Another interesting note – a sound post setter can be adjusted in shape to fit one’s needs.
The final piece of equipment for basic setting is a regular card cut down the center:
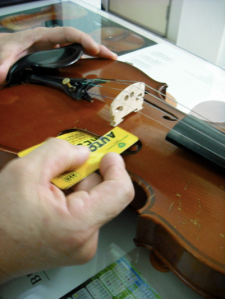
which is used to help us check where the sound post is placed in relation to the bridge.

VERY INTERESTING ARTICLE
Thanks for posting, this is helping me a lot on my own personal journey to restore all of my father’s old violins 🙂
Mr. Filmer, Thank you for your observation about how we know how to do so little these days – it can apply to many areas. I am glad for your approach, and that you are encouraging others as well. Failing at, or even ruining something altogether, are not reasons in themselves to NOT try to do something. (No Kitty Hawk, no light bulb, no cotton gin, no sewing machine, no Braille system, no Pres. Lincoln, whether one liked him or not). We don’t balk at spending money on music lessons or a college education….just on learning to do something new without a certified teacher to approve of us. It is a crippling all of its own. Anyway, thanks for your plug, and for your information.
Love this. It has great information I have not found elsewhere. Thank you!!!
Thank you very much for your encouraging and informative observations!
Informative article! Thank you. If a violin is normally open and warm sounding, but is now a bit harsh and hard to make “speak” at softer volumes, which direction would you suggest moving the sound post? My luthier has tried several times to make it right, but we can’t seem to find that “sweet spot”.
I have a violin that normally sounds warm and “open” – no harshness whatsoever. However, it now has a harsh edge, and is difficult to make “speak” at softer volumes. My luthier has tried moving the sound post several times. We can’t seem to find that sweet spot. Any suggestions on which direction to move the sound post? (It’s a mid 18th century Czech instrument. Sound post is generally further back from the bridge than “normal”).
Unfortunately my expertise isn’t in instrument-making – I just put up this post as an introduction to others, in the same way that it was for me.
Very good thank you
Excellent commentary on a mysterious art. Thank you.
Thank you very much! I’m going to set my post tonight.
Thank you sir, you are the only source I’ve found, thus far, that ACTUALLY mentions the proper grain direction of the sound post, relative to the top plate’s grain direction, that being 90 deg.!!!!