Note: This tutorial is meant as a supplement to my digital painting tutorial.
What you will need
- Adobe Photoshop.
- A reference photograph.
Why not use the grid tool?
Photoshop can’t currently create proportional grids with the grid tool, it’s a global setting that gets applied to every document. So while it might be great for guides it’s not good for creating reference grids.
Here is an example:
In the grid below I created a 2×2 inch square and created a gridline every 1 inches, note the four squares

I want to create an image that is twice the size of this while also having four squares (a gridline every 2 inches). If I simply create a 4×4 inch square canvas I will get the following.

Notice that this has 16 squares whereas the other one only has 4!
At the moment there is no way to set a different grid for each document. So until Adobe changes that you will need to use the technique illustrated below to create your proportional grids.
Part One: Preparing a grid for your reference photo.
Find the width of your reference image
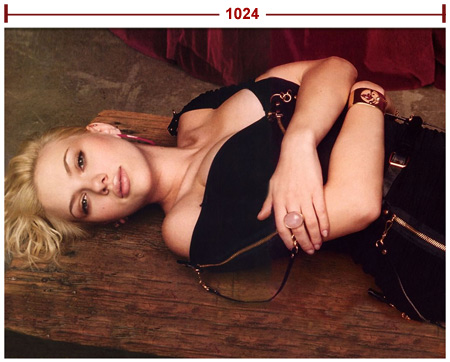
First thing you need to do is find the width of your reference image. In my case it’s 1024px.
Find the width of each square in your grid
Because I wanted 10 squares in my grid I divided that number by 10. Find the number of squares that’s appropriate for you. Generally a good range is between 8 and 12.
1024px/10 = 102.4px
Because you can’t have .4 pixels I rounded this down to 102.
Create the square pattern.
Open a new document and set the width and height to 102 pixels.
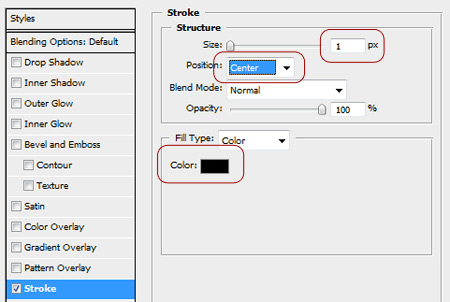
Unlock the background layer by double clicking it. Click the little Fx at the bottom of the layers palette to open the layer style window. Apply these settings.
Next go to Edit > Define Pattern. Give it the name Grid and click OK
Create the grid channel.
Go to your reference image.
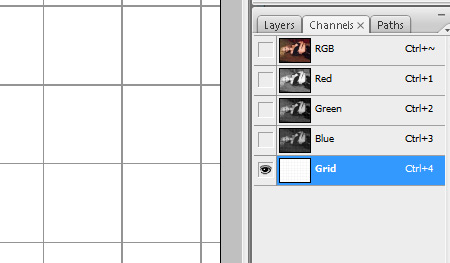
Click Window > Channels To bring up the channels tab. Create a new channel and name it Grid.
Type Shift – F5 to bring up the fill dialog.
Select Pattern from the drop down menu and then select Grid (the one you just created).
Click Ok
It should look something like this.
Fill the grid lines with black
Go back to the layers palette and create a new layer on top of your reference photo, name this layer Grid.
Go to Select > Load Selection. Select Grid from the drop down menu and click ok.
You should see a selection mask.
Go to Select > Inverse to invert the selection.
Press Shift – F5 and select Black From the drop down list.
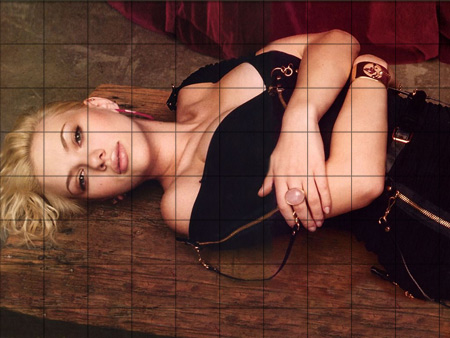
Presto! You have a grid!
Part Two: Preparing a grid for your canvas.
Create a new canvas the same size as your reference photo. In my case it was 1024 x 768 pixels.
Create a new layer above the background layer, name this Grid
Like before, go to the channels palette and create a new channel and name it Grid, with the
new channel selected, press Shift – F5 and select your pattern.
Go back to the layers palette select the grid layer and go to Select > Load Selection. Select
Grid from the drop down menu and click Ok.
Invert the selection mask and fill it with black.
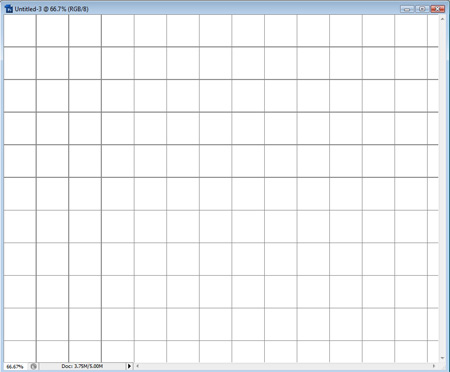
It should look like this.
Make the canvas larger than the reference
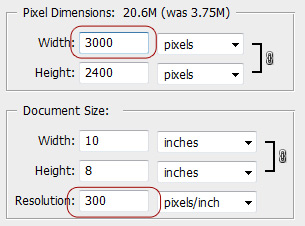
If you’re making this grid for the portrait, it’s a good idea to make the canvas larger than the image source.
Go to Image > Image Size and apply these settings.
Comments
Post by john on April 20, 2008
your tutorials are brilliant thank you
Post by Hawk on November 7, 2008
Very Helpful, THANKS!
Post by Jade on February 20, 2009
Fraid it won't work for me. I go to add a stroke but nothing shows on the new document thus I can't define a pattern cos Photoshop counts it as empty.
Post by Josh on March 31, 2009
This worked well, thanks.
Post by Tony on April 2, 2009
Why not just simply use the grid feature in photoshop? You can set the size and frequency and it's much faster.
Post by Tony on April 2, 2009
To make Grid visible ////////////// View/ Show/ Grid To edit the Grid ///////////////// Photoshop/Preferences/Guides, Grids & Slices I'm using CS4 but I'm pretty sure this has been around for a few versions.
Post by Joshua Bolduc on May 15, 2009
Photoshop's grid tool is used for aligning objects. This grid is for capturing proportions between different size images. You can't get the same proportions with Photoshop's grid tool unless the canvas is the same size.
Post by Vegar on July 21, 2009
Excellent! Clear and well written. Thank you!
Post by anubhav on July 27, 2009
Create the square pattern. Open a new document and set the width and height to 102 pixels. Unlock the background layer by double clicking it. Click the little Fx at the bottom of the layers palette to open the layer style window. Apply these settings. I CANT UNDERSTAND PLZ EXPLAIN ?
Post by Anubhav on August 9, 2009
How to make a grid with white lines on black or dark backgrounds ????
Post by Vola on January 31, 2010
This is just AWESOME. I needed to reference some pictures for a drawing, and the were on the PC and thi is just what i needed. If you need it to be white, instead of putting the "black" setting in this part: "Press Shift - F5 and select Black From the drop down list",just put white.
Post by Michael Tan on February 8, 2010
Hey! Your tutorial is very helpful. Tks for the tips!
Post by Alana Dwek on February 25, 2010
i didn't know photoshop was used for grids? what happened to in design?! photoshop is for photo's, illustrator text/type and indesign layout eg. books, magazine, posters, grids etc...
Post by Person on April 11, 2010
in Photoshop CS3 on a the Mac: 1. go to View->Show->Grid 2. got to Photoshop->Preferences->Guides, Grids, Slices & Count 3. Change the size of the Grid as suits you. 4. Done
Post by Person on April 11, 2010
am not sure why you think you can't get the right proportions. you can set the grid size by pixel, cm, percents, etc.. just do the first part of the calculation you did, then set the grid size based on it. thank you for your helpful tutorials. we really appreciate them.
Post by Person on April 11, 2010
ok, my apologizes, now i know what you mean. i can't draw curved line properly when the grid is in place. the brush tends to try and follow the grids ending up with a staircase appearance.
Post by AnotherPerson on April 11, 2010
actually, Person, you just need to deselect the "Snap to Grid" option and you're good to go. it won't follow the grid that way and you won't have that "staircase" effect. so yeah, just use grids. it works.
Post by admin on April 12, 2010
I expanded the article at the top to illustrate why you can't use the grid tool to create proportional grids. Hopefully this should help clear any confusion.
Post by Paul on May 13, 2010
Hi. Wanted to add a faded, but consistent grid as a background to my logo. This worked an absolute treat. My logo is black, so I just substituted the stroke to a white colour. I then lowered the opacity down to 10% on the layer that the grid sits on. Clear and easy to use tute, Many Thanks, Paul
Post by gianni on May 25, 2011
Very good tutorial, I slightly modified it for my needs in the square patterns creation step. By using the stroke method you finally get a 2px grid, I manually filled 102x1px on top side and 1x102px on left side to get a 1px grid
Post by Paul Hamlyn on December 30, 2011
Hi Joshua, Is it possible to print the image with the grid? I have a landscape image gridded up, but when I print, it appears without the grid! Thanks, Paul
Post by Chris on May 16, 2013
I can't seem to save it, I did everything you said and it shows up on my image, but I can't save the image with the grid. How do I do this?
Post by juliastanton on January 11, 2015
can you do this in photoshop elements???