 |
|
||||||
| Multiple ways to get a white background | |
   |
|
Using Photoshop Levels to make an off-white background "disappear" |
|
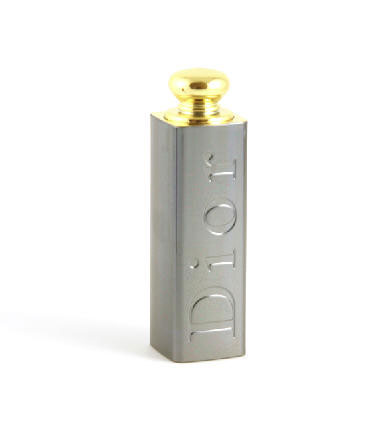
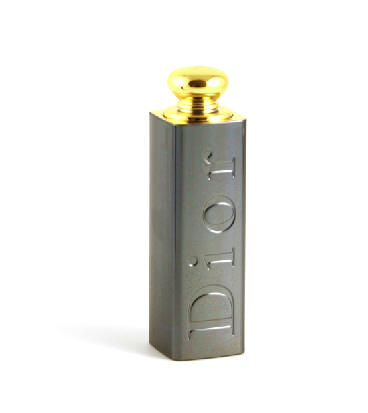
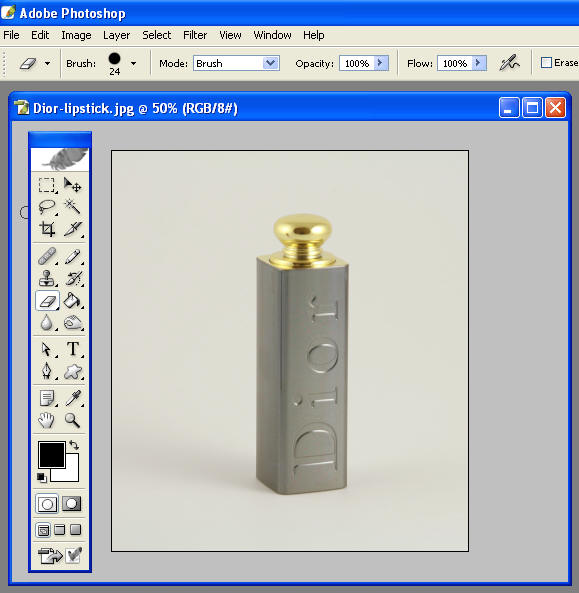
| A common inquiry we receive is: "I used one of your kits to take a great product shot, now how do I make an off- white background disappear". Often the solution is very easy and doesn't require fancy under lighting nor hours of Photoshop work. In this tutorial we will show you one of the easiest, yet most powerful image enhancement tools in Photoshop; the Levels Adjustment. Take a look at the two images below. If your image looks like the one on the left, but you would like it to look like the one on the right, then keep reading. | |
|
|
|
|
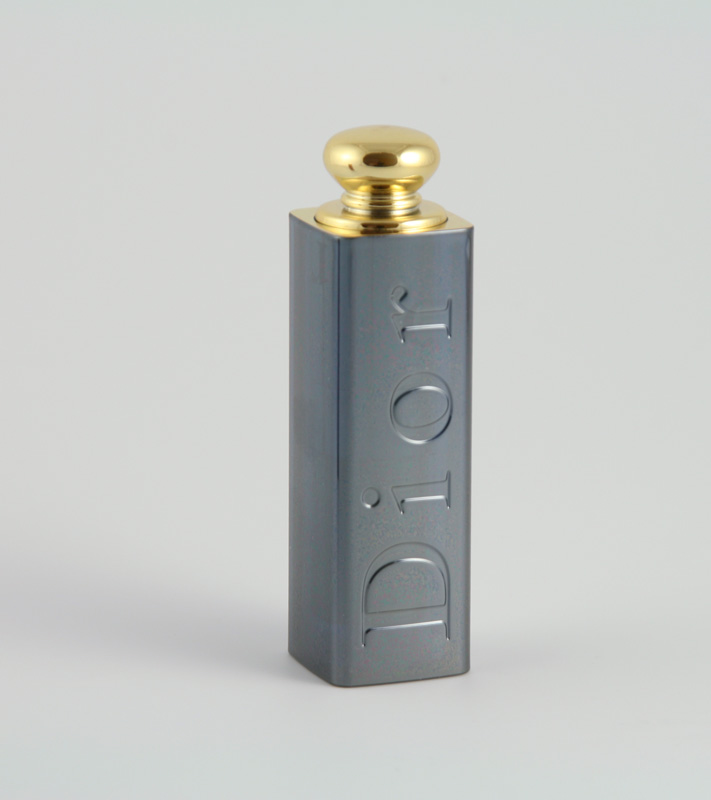
You can use Levels to change the image on the left into the image on the right in less than 30 seconds. |
|
| First, it is important that your image is correctly exposed. If both your background and your subject appear too dark, then it is likely that you have underexposed your image, and the following technique will not give you the desired results. (If your entire image is too dark, then first take a look at our "Avoiding Dark Images" Tip.) The Levels technique we use in this tutorial is only designed to help you whiten the background of a correctly exposed image. In the images above, the subject looks correctly exposed, but the background on the left appears gray rather than white; we will correct that with Photoshop's Levels adjustment.*(Normally your background will not be quite this dark, but by working with an example with a darker background like this one you will be able to see the effect more clearly). | |
|
______________________ |
|
|
Open the image (5 seconds) |
|
|
|
|
|
______________________ |
|
|
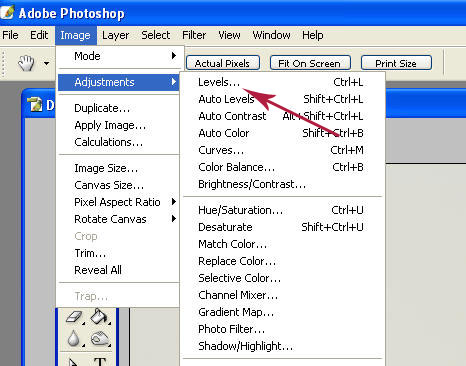
From the tools along the top select: Image>Adjustments>Levels (3 seconds) |
|
|
|
|
|
______________________ |
|
|
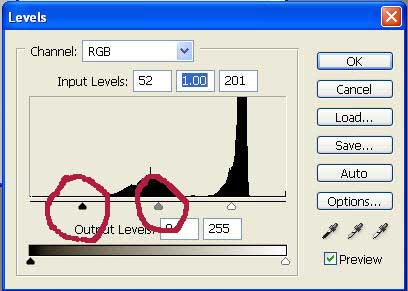
A complicated looking window will open up, don't panic. For now you can ignore everything except the clear triangular-shaped slider near the middle of the Levels menu. |
|
|
|
|
|
______________________ |
|
|
Grab the slider on the right and slowly drag it towards the left. (5-10 seconds) Notice that the background gets lighter. The further you move the slider to the left, the lighter the background gets. You should slide it just until the background has gone completely white, but before the subject itself has been affected too much. |
|
 |
 |
|
You might be happy with how the image looks now; if so, you are finished and you can move on to another image. But chances are, by the time you get to the point where the background is completely white, the subject itself will have started to fade a little. We will correct this in our next step. |
|
|
______________________ |
|
|
If the subject looks a little washed out, drag each of the other two sliders a little to the right. (5-10 seconds) That will darken the subject. (The left most slider adjusts just the darkest parts of the image and the middle slider controls the mid-range tones of the image). |
|
 |
 |
|
That's it, you should be finished. Make sure to save a copy of the file with a new name. |
|
 |
 |
|
Notice how we have whitened the background, but have kept the original shadow. |
|
| After you have done this
a few times it should take you less than 30 seconds to get from the image
on the left to the one on the right! This technique doesn't work on all
images, especially those with light colored subjects. But for many
images it's almost a magical way to get a pure white background with a
minimum amount of work.
If you would like to practice the with image we used in this tutorial, you can find it here. |
|
|
______________________ |
|
| *This same technique is also available in Photoshop Elements and as well as some of the other popular image editing programs. | |
