• You can now help support WorldwideDX when you shop on Amazon at no additional cost to you! Simply follow this Shop on Amazon link first and a portion of any purchase is sent to WorldwideDX to help with site costs.

Kenwood TH-D75A Review - It's Finally Here!

The Kenwood TH-D74 was my favorite handheld radio that I had ever owned. While pricey, it was packed with features and quality unlike no other. When the radio was discontinued due to a factory fire in Japan, the remaining TH-D74 stock sold out in weeks at elevated prices. I even purchased a new shell on eBay as an insurance policy, just in case my radio got damaged. Rumors of the new TH-D75 replacement started surfacing late spring of 2023, with the product reveal coming at Dayton Hamvention that same year. A year later, the radio is finally available for the masses, and I received the one I purchased this week!

Overview
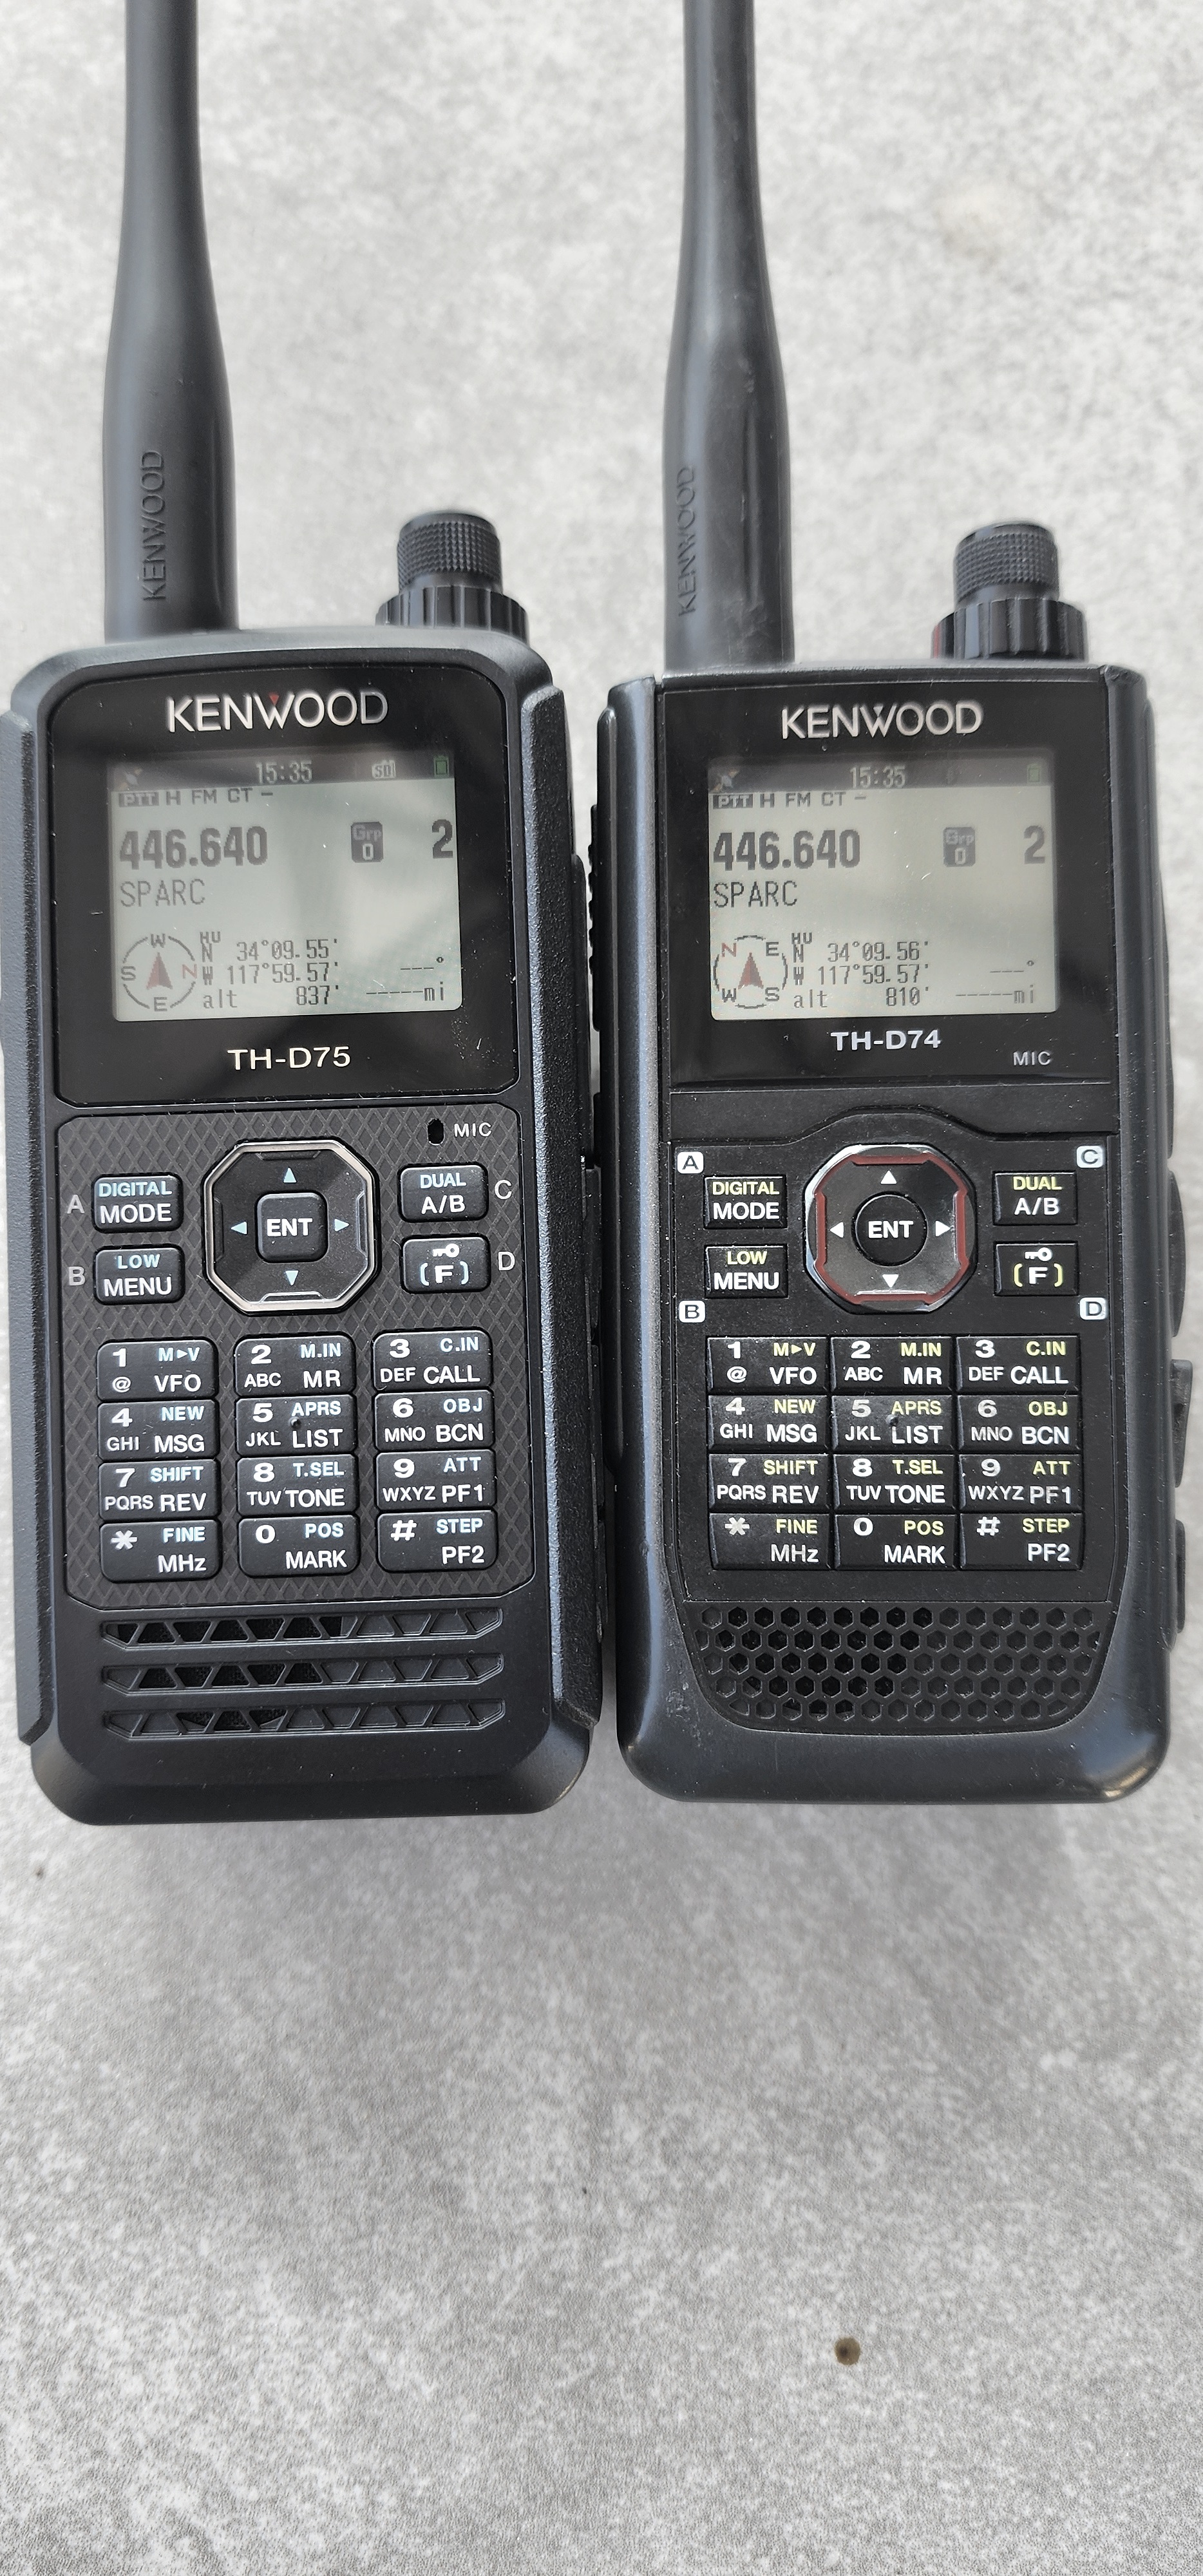
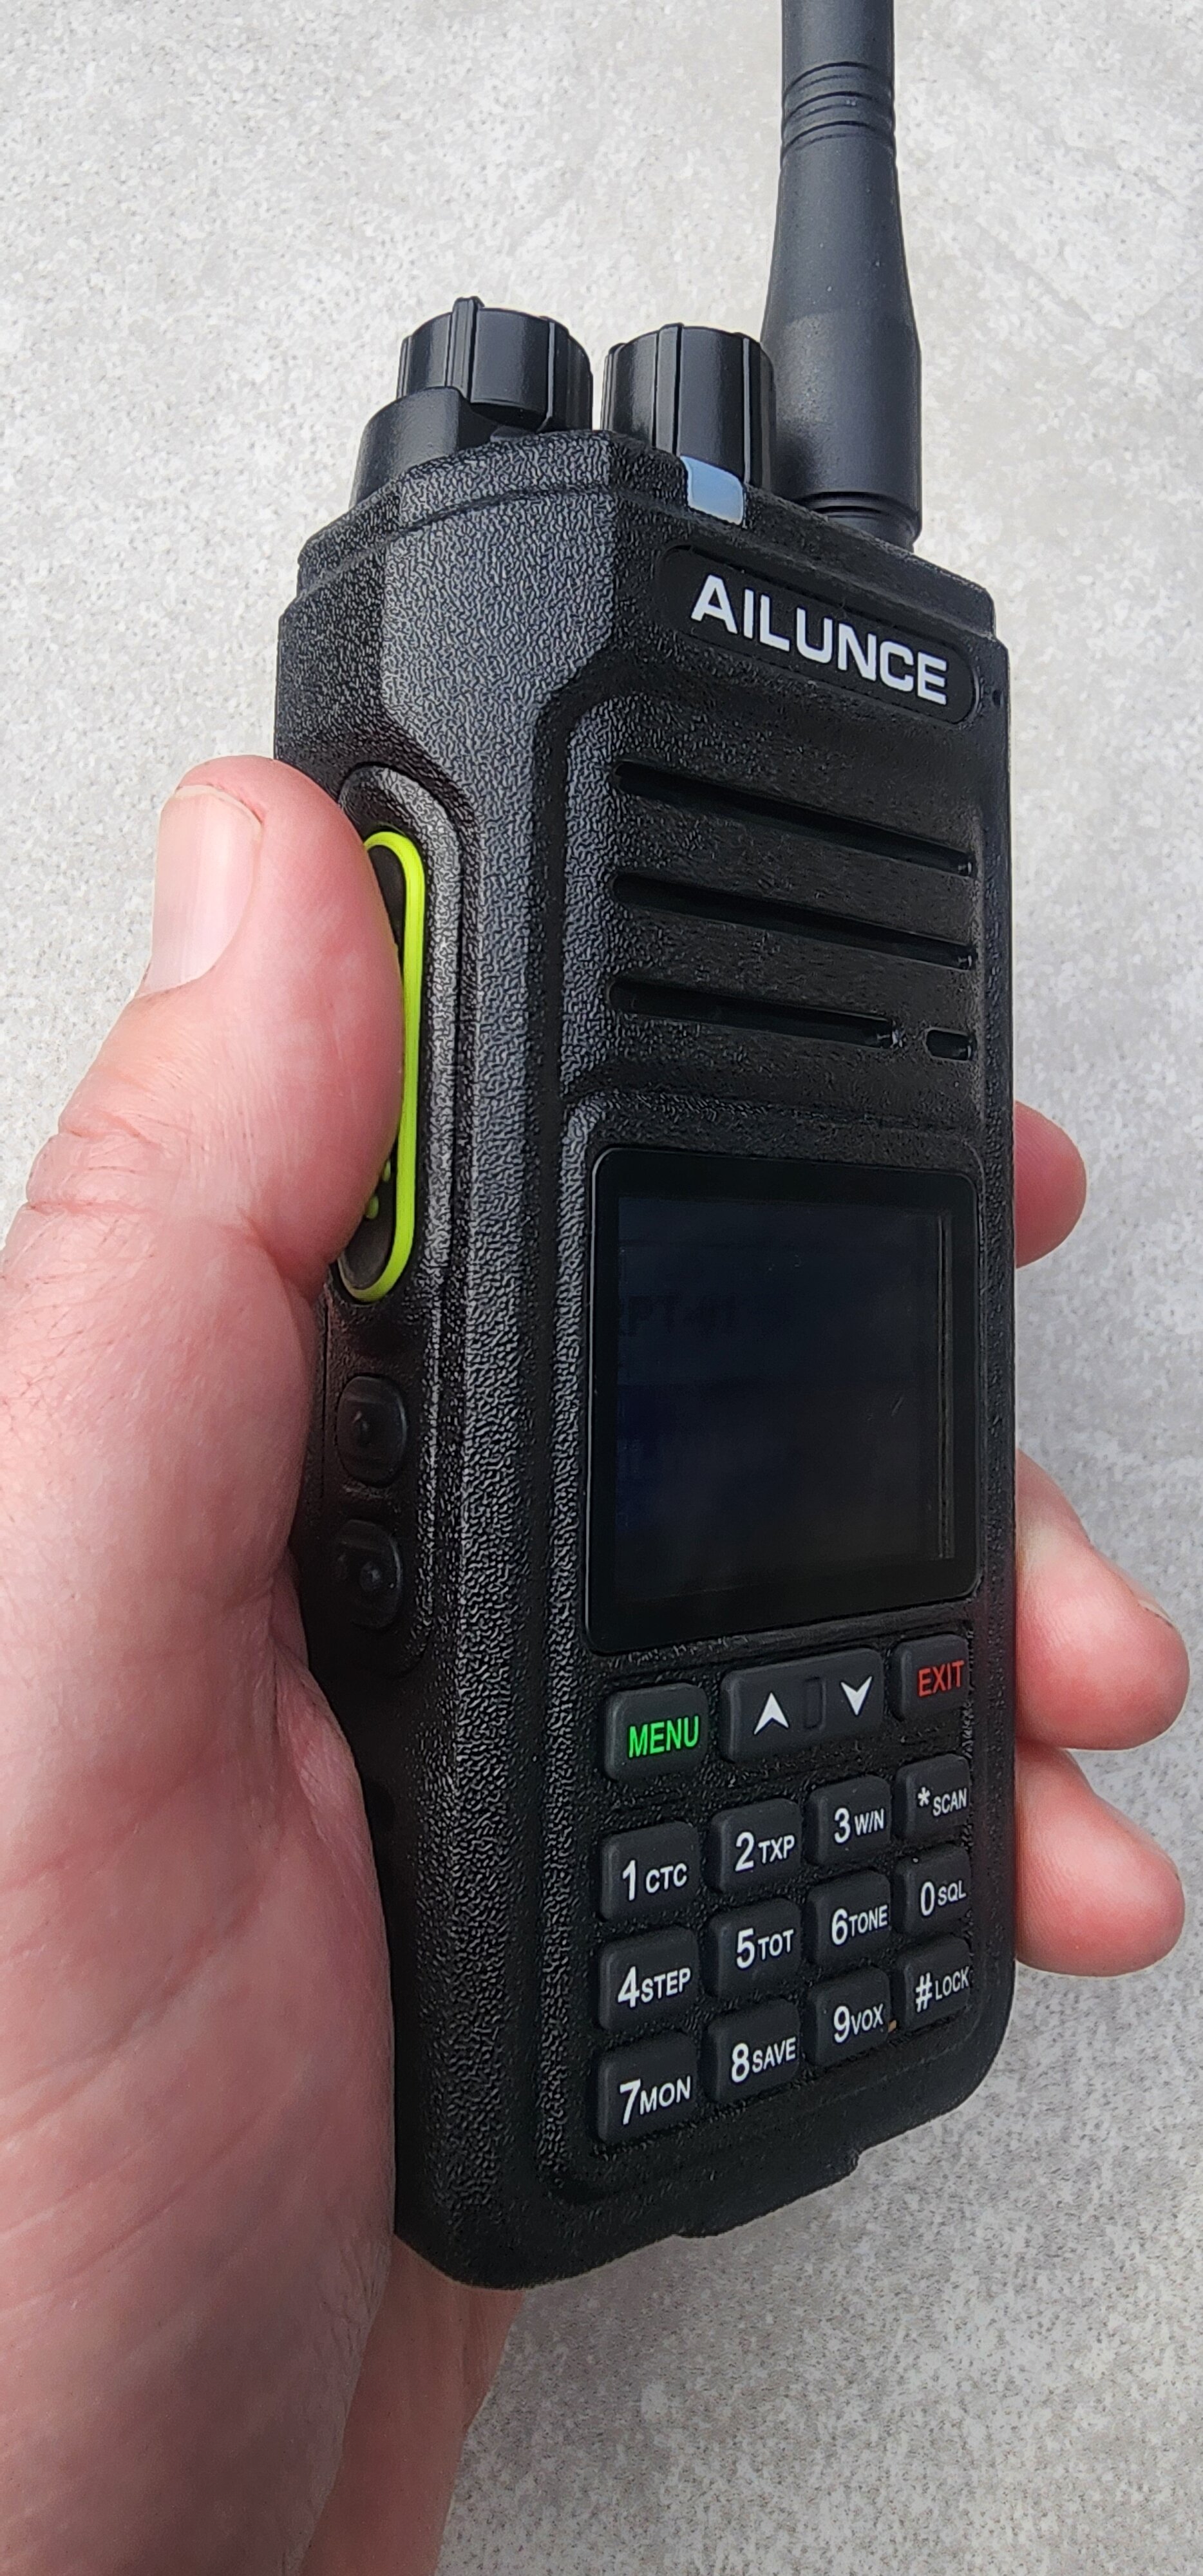
The new TH-D75 is almost identical in form factor to its predecessor with only some new rounding of corners, different texturing, and improved rubber covers for the ports. Here's a pic of the two radios next to each other:
full


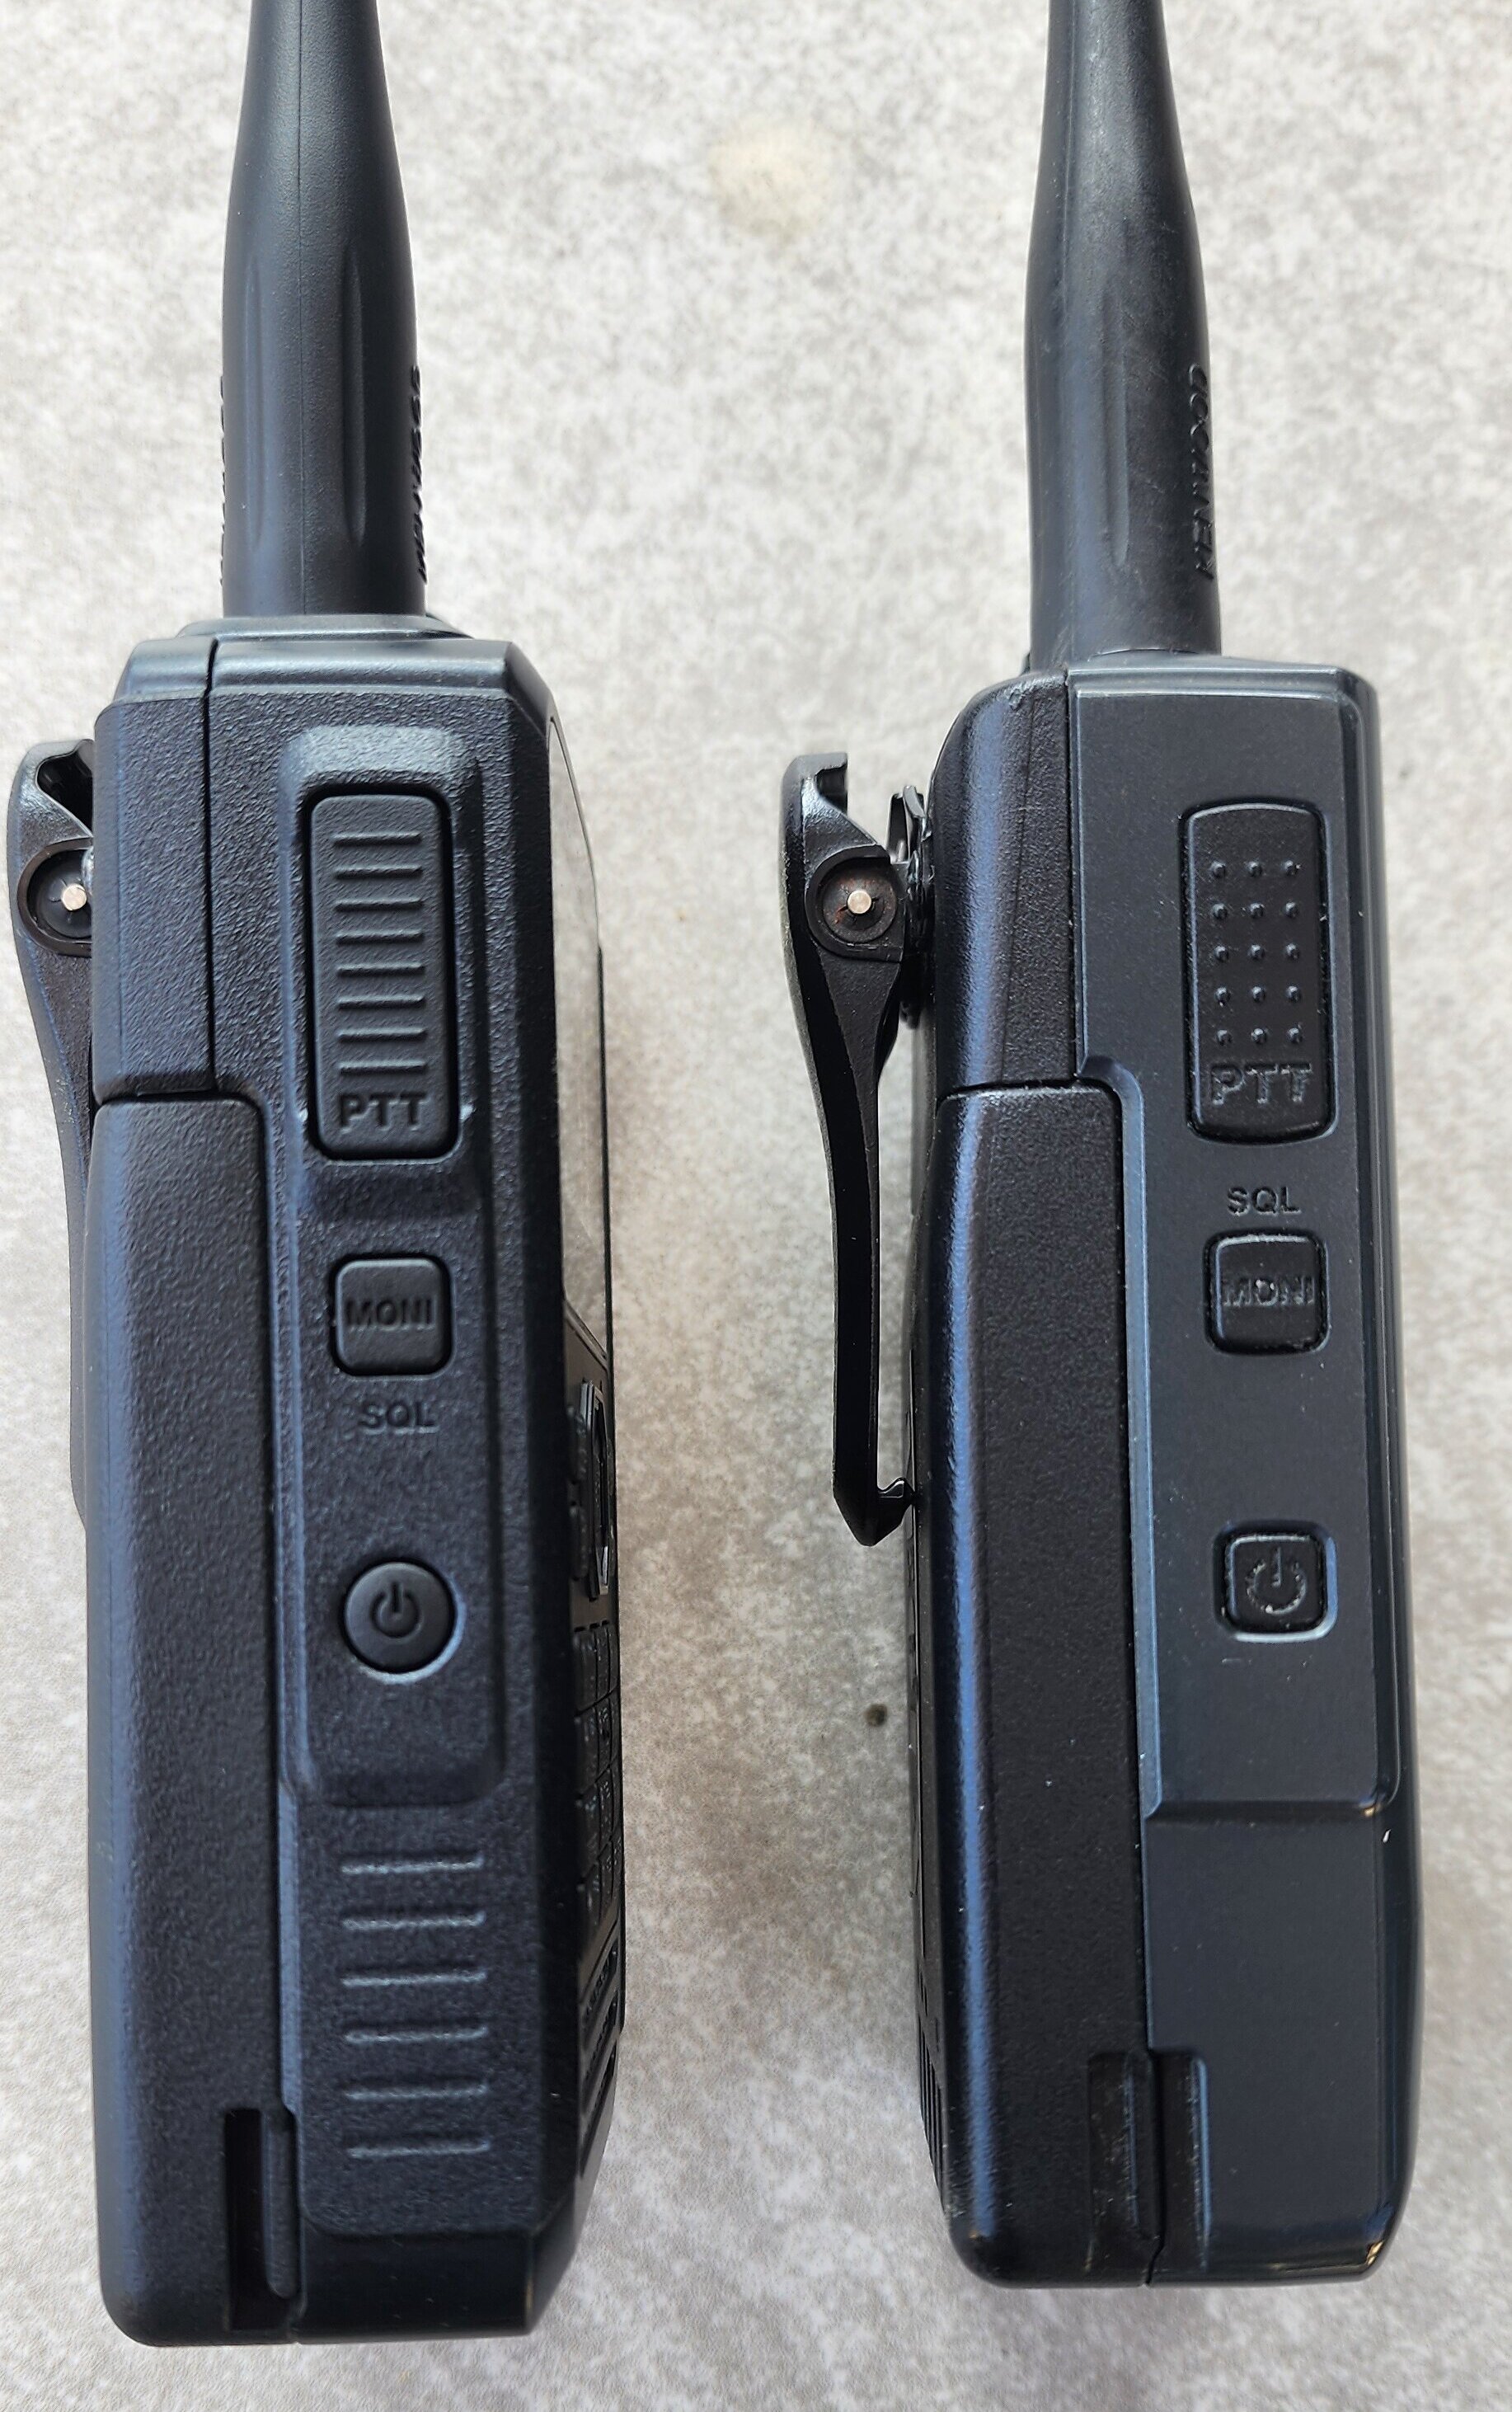
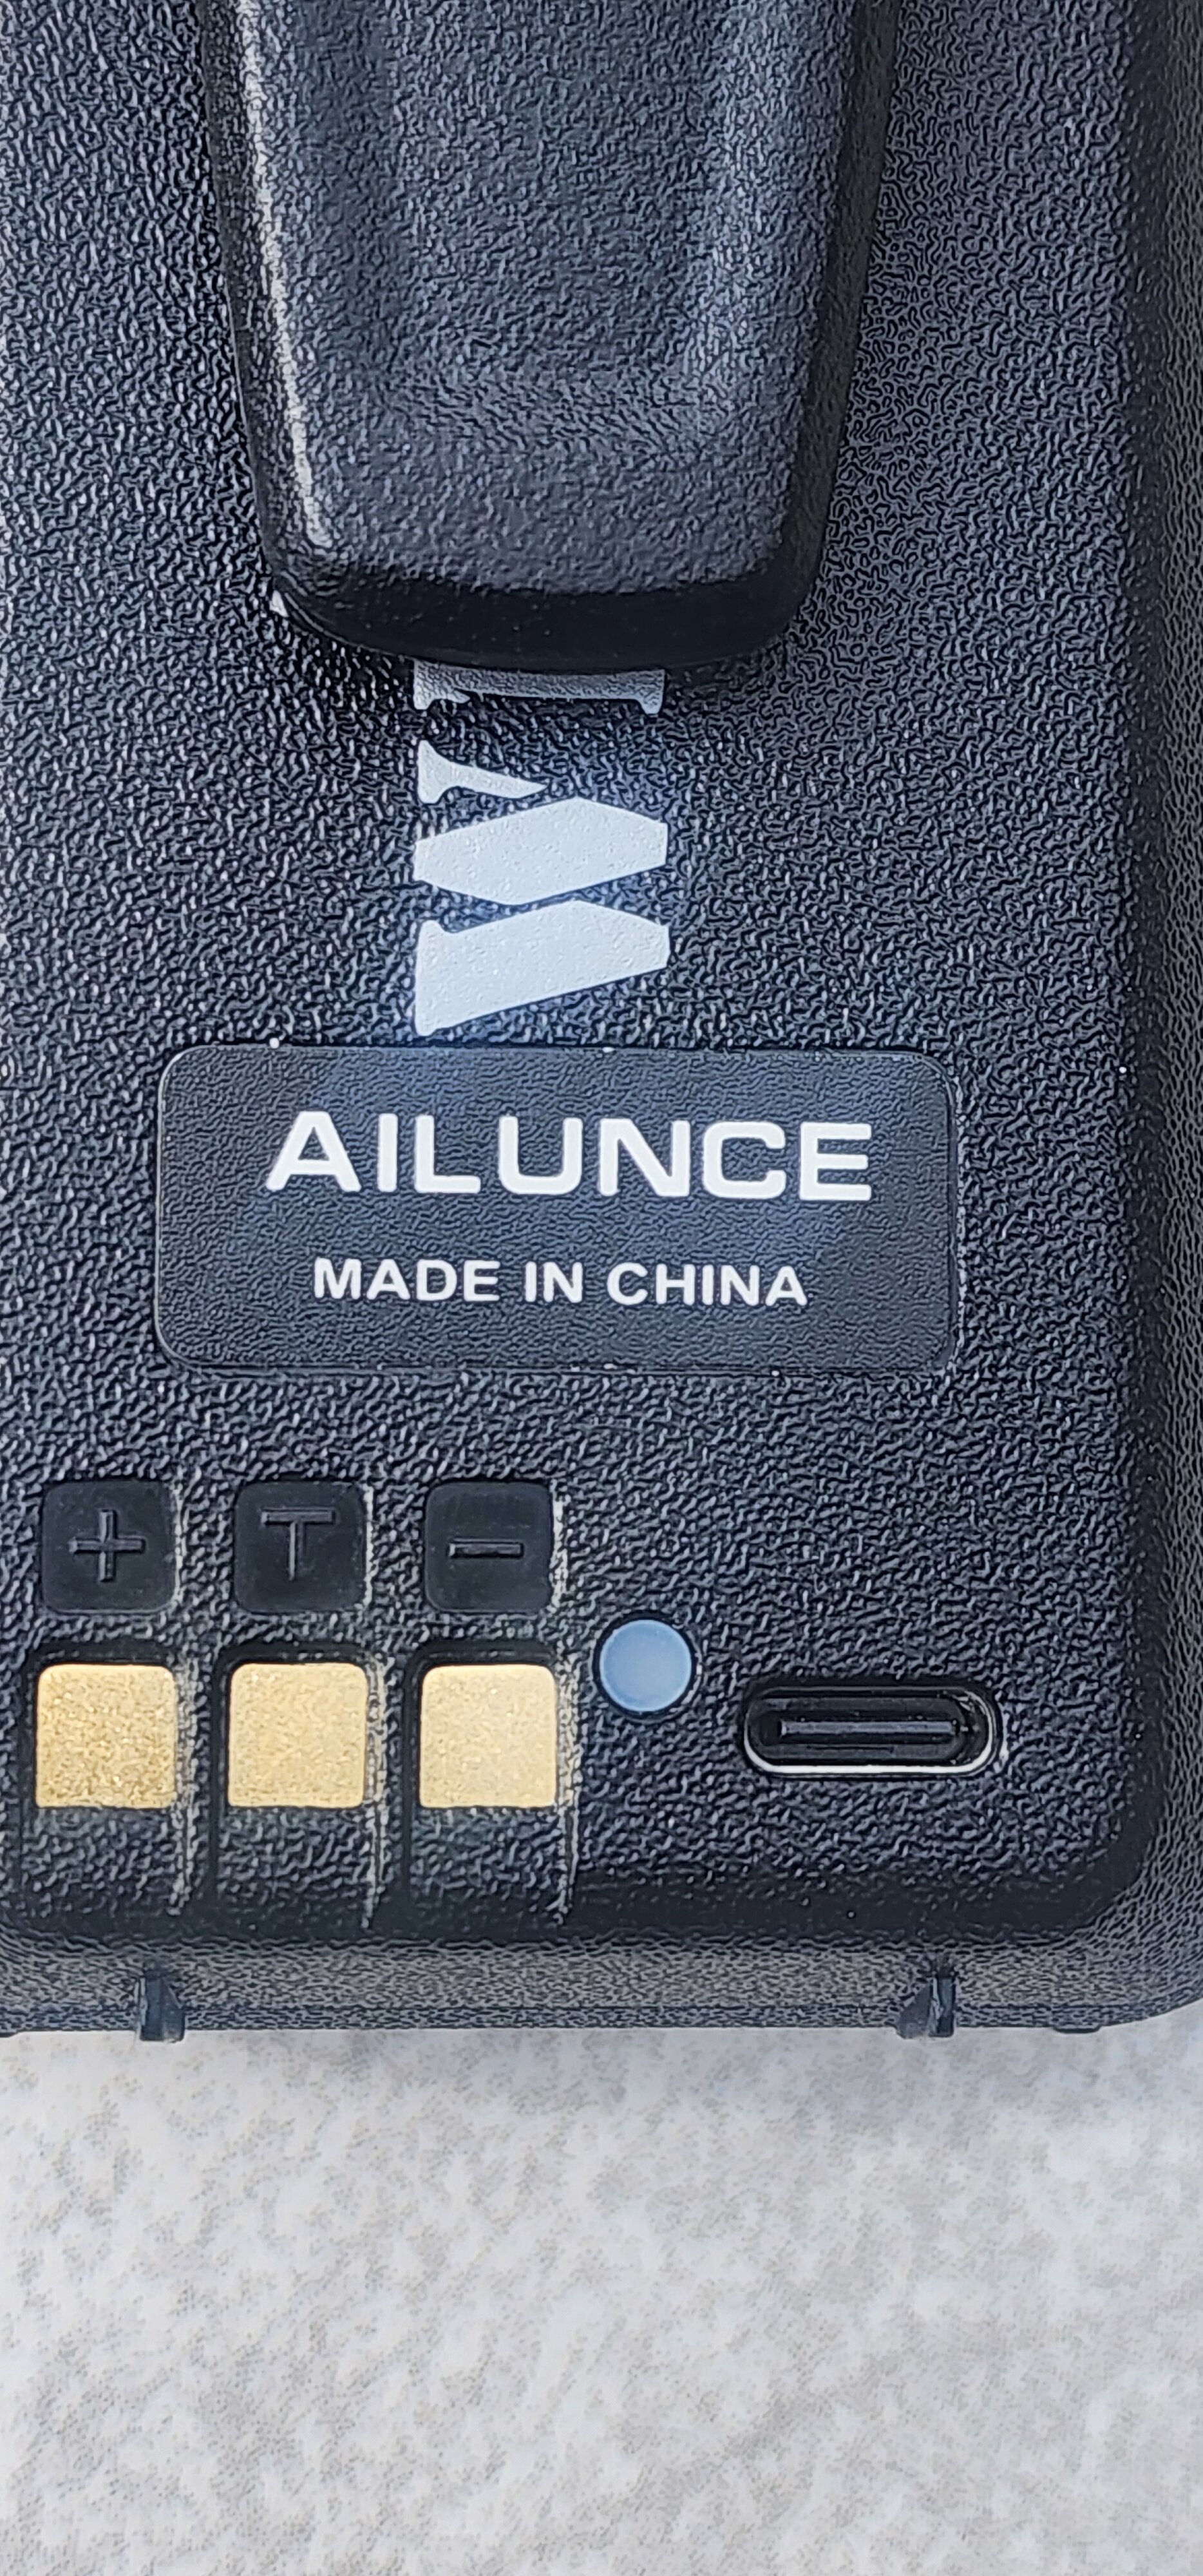
The dimensions of the old and new model are identical in almost every way. In this pic, you can see that the battery dimension are the same. While the TH-D75 has a slightly enhanced, spring loaded battery fastener, the two batteries are actually interchangeable. In the pic below, the TH-D75 is on the left:
full


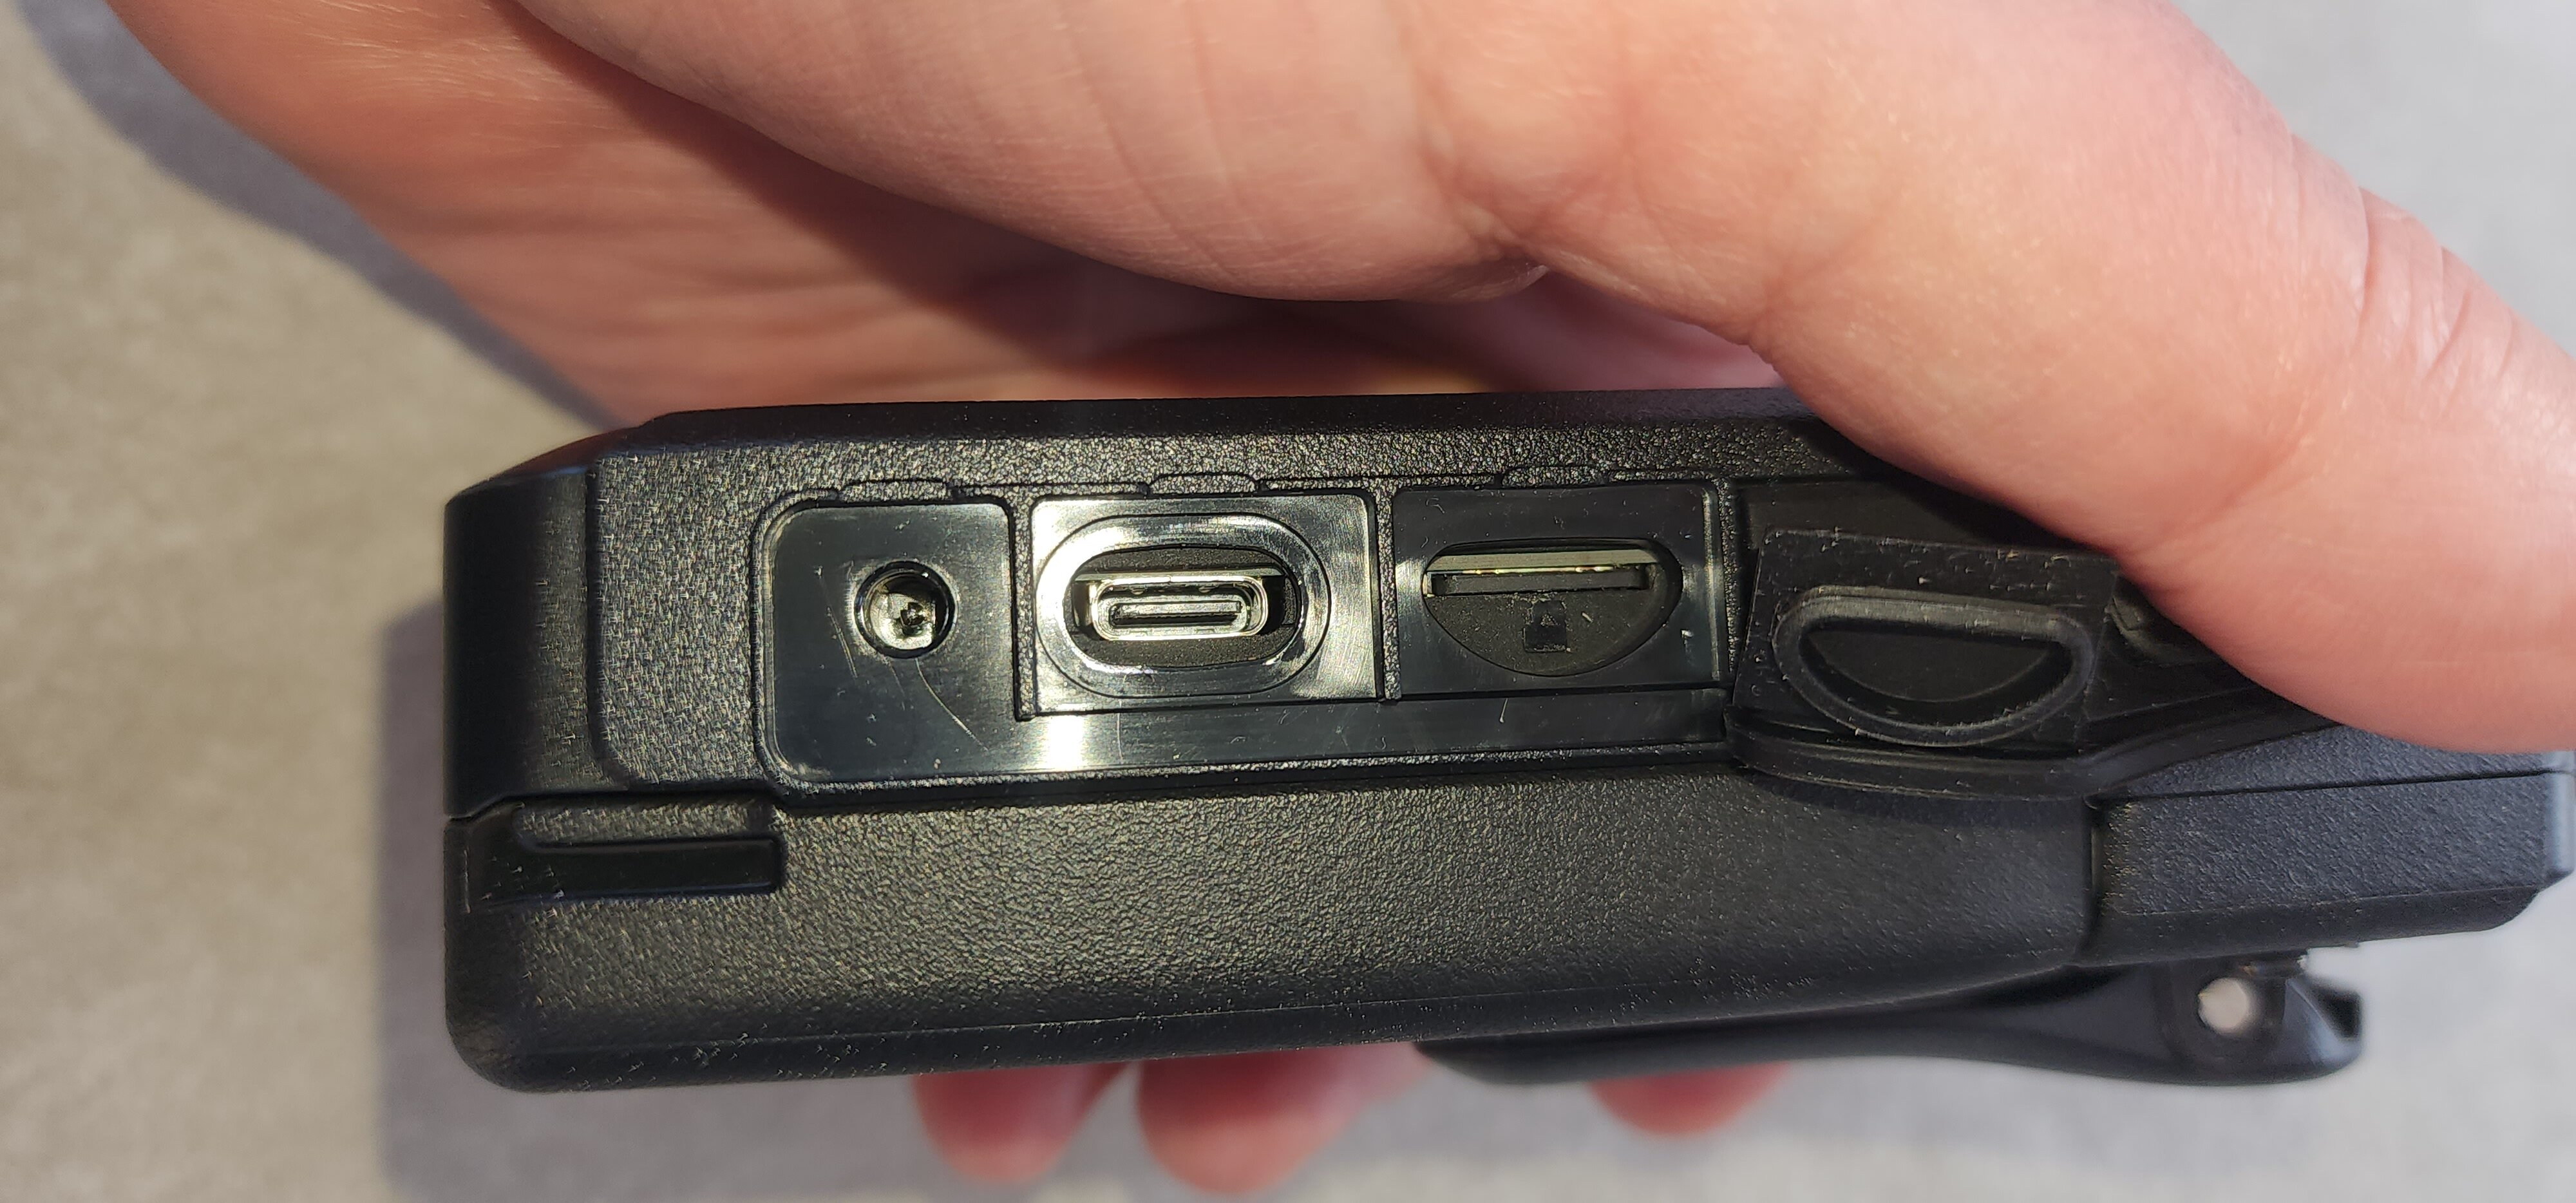
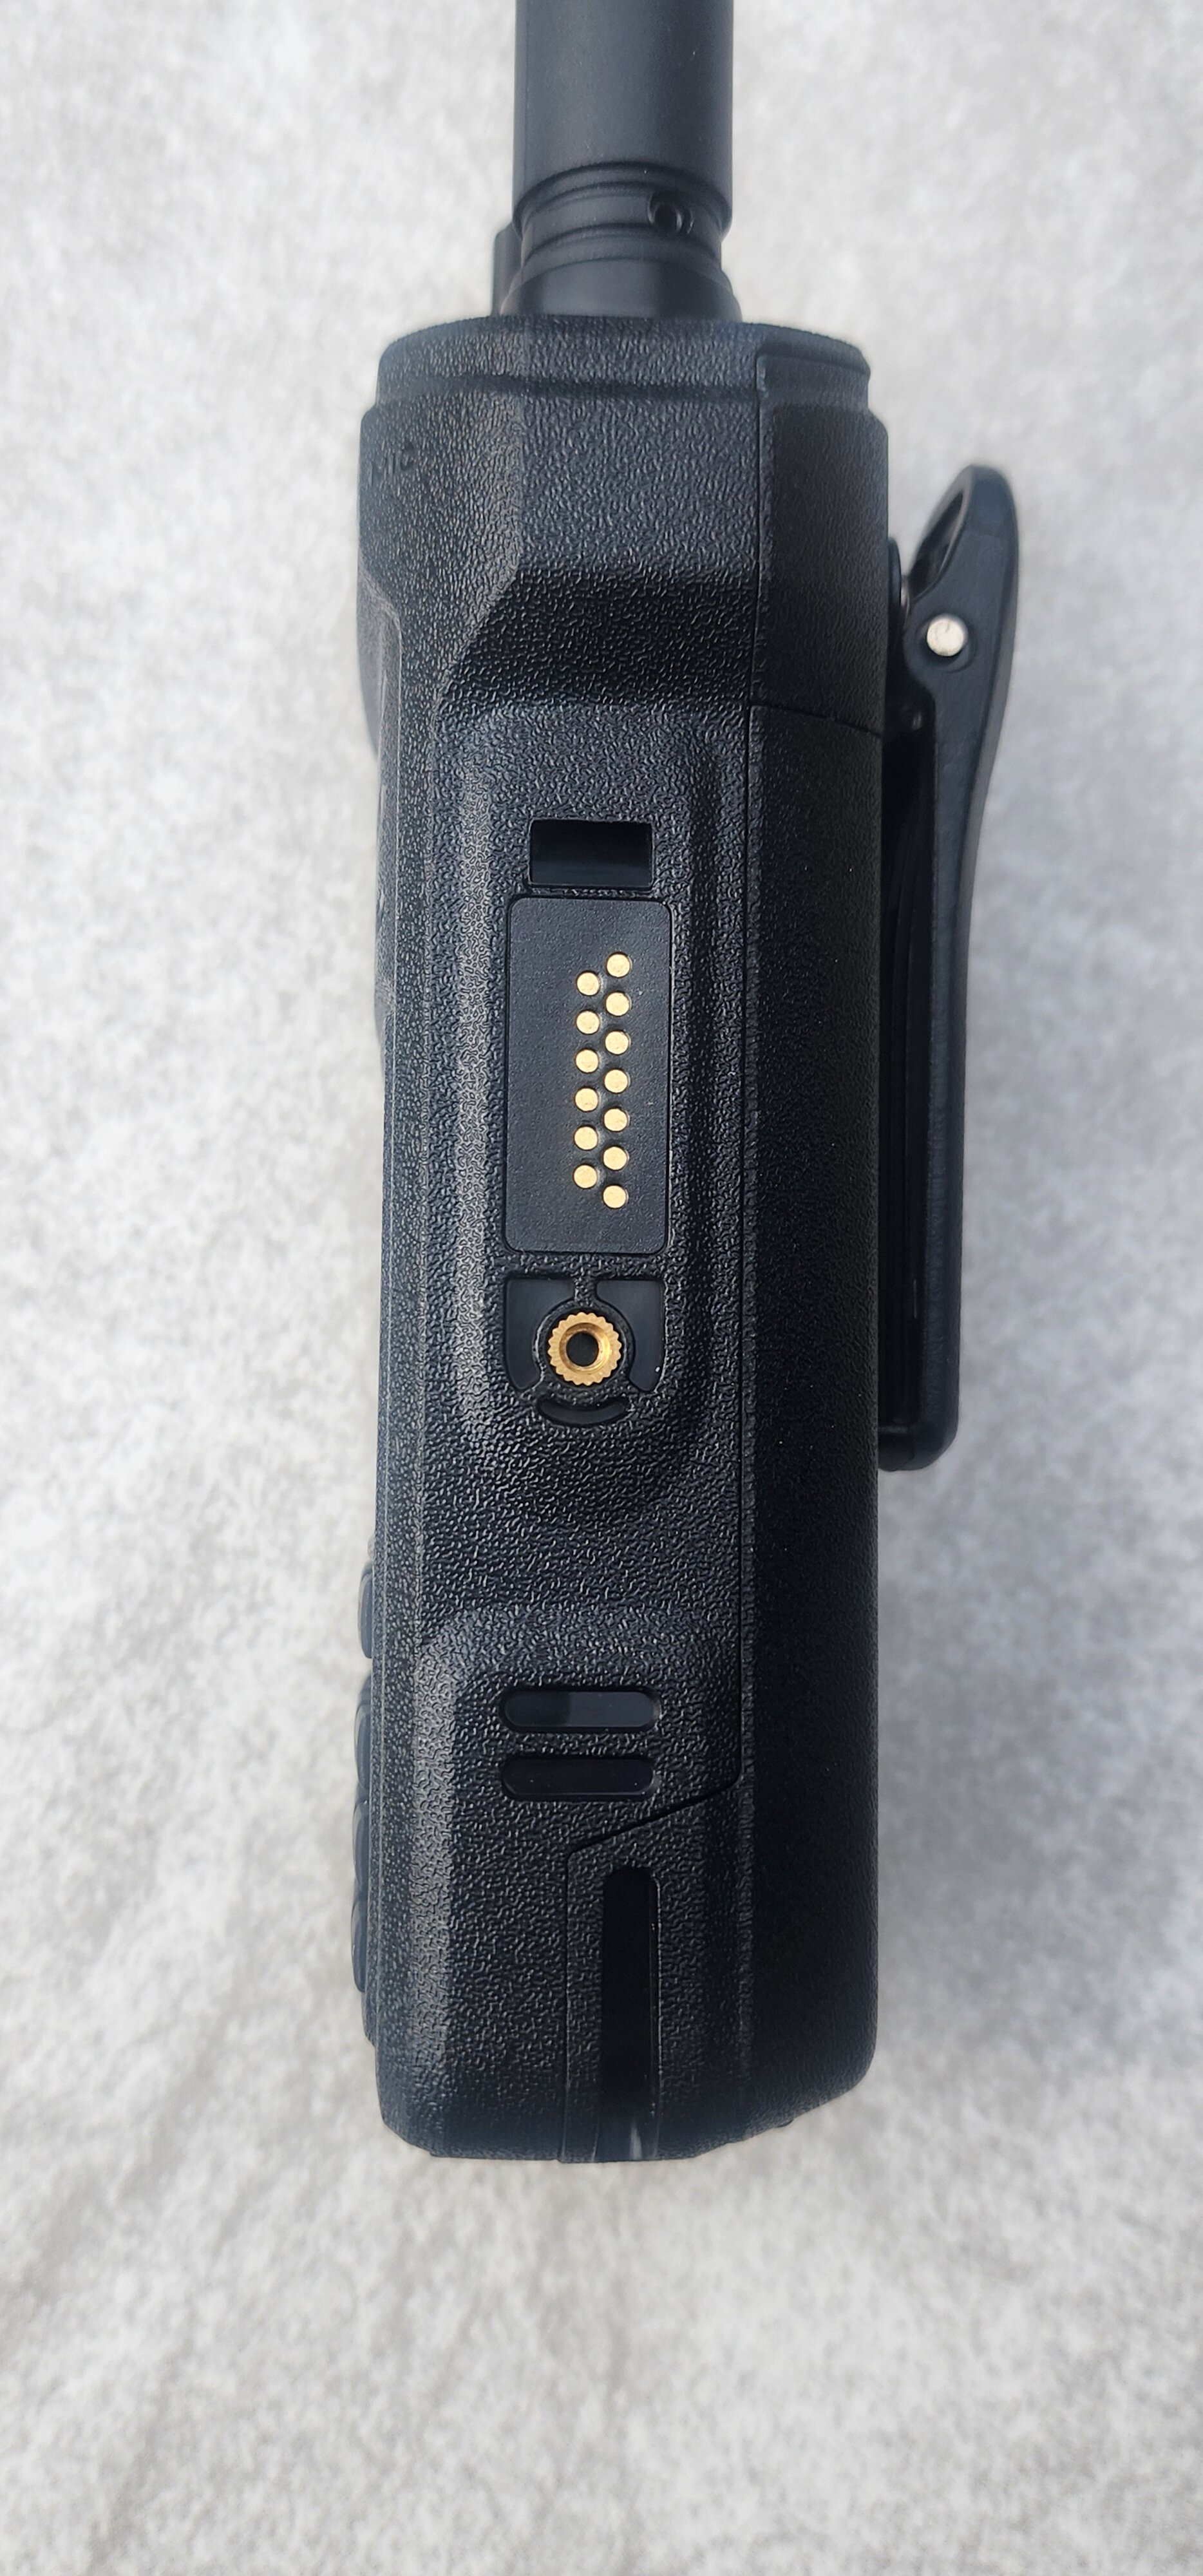
As far as I can tell, the new TH-D75 has all of the same features as the older TH-D74. The micro-usb has been replaced with a USB-C that acts as both a charging port and a rig interface. While there are many inexpensive radios with USB-C for charging, the TH-D75 will charge while also acting as a PC interface at the same time. This feature alone is important if you want to take advantage of the new APRS digipeater function, interfacing it to an internet connected PC. The many D-Star interface features will utilize this feature, as well.

full


New D-Star DV Gateway Feature
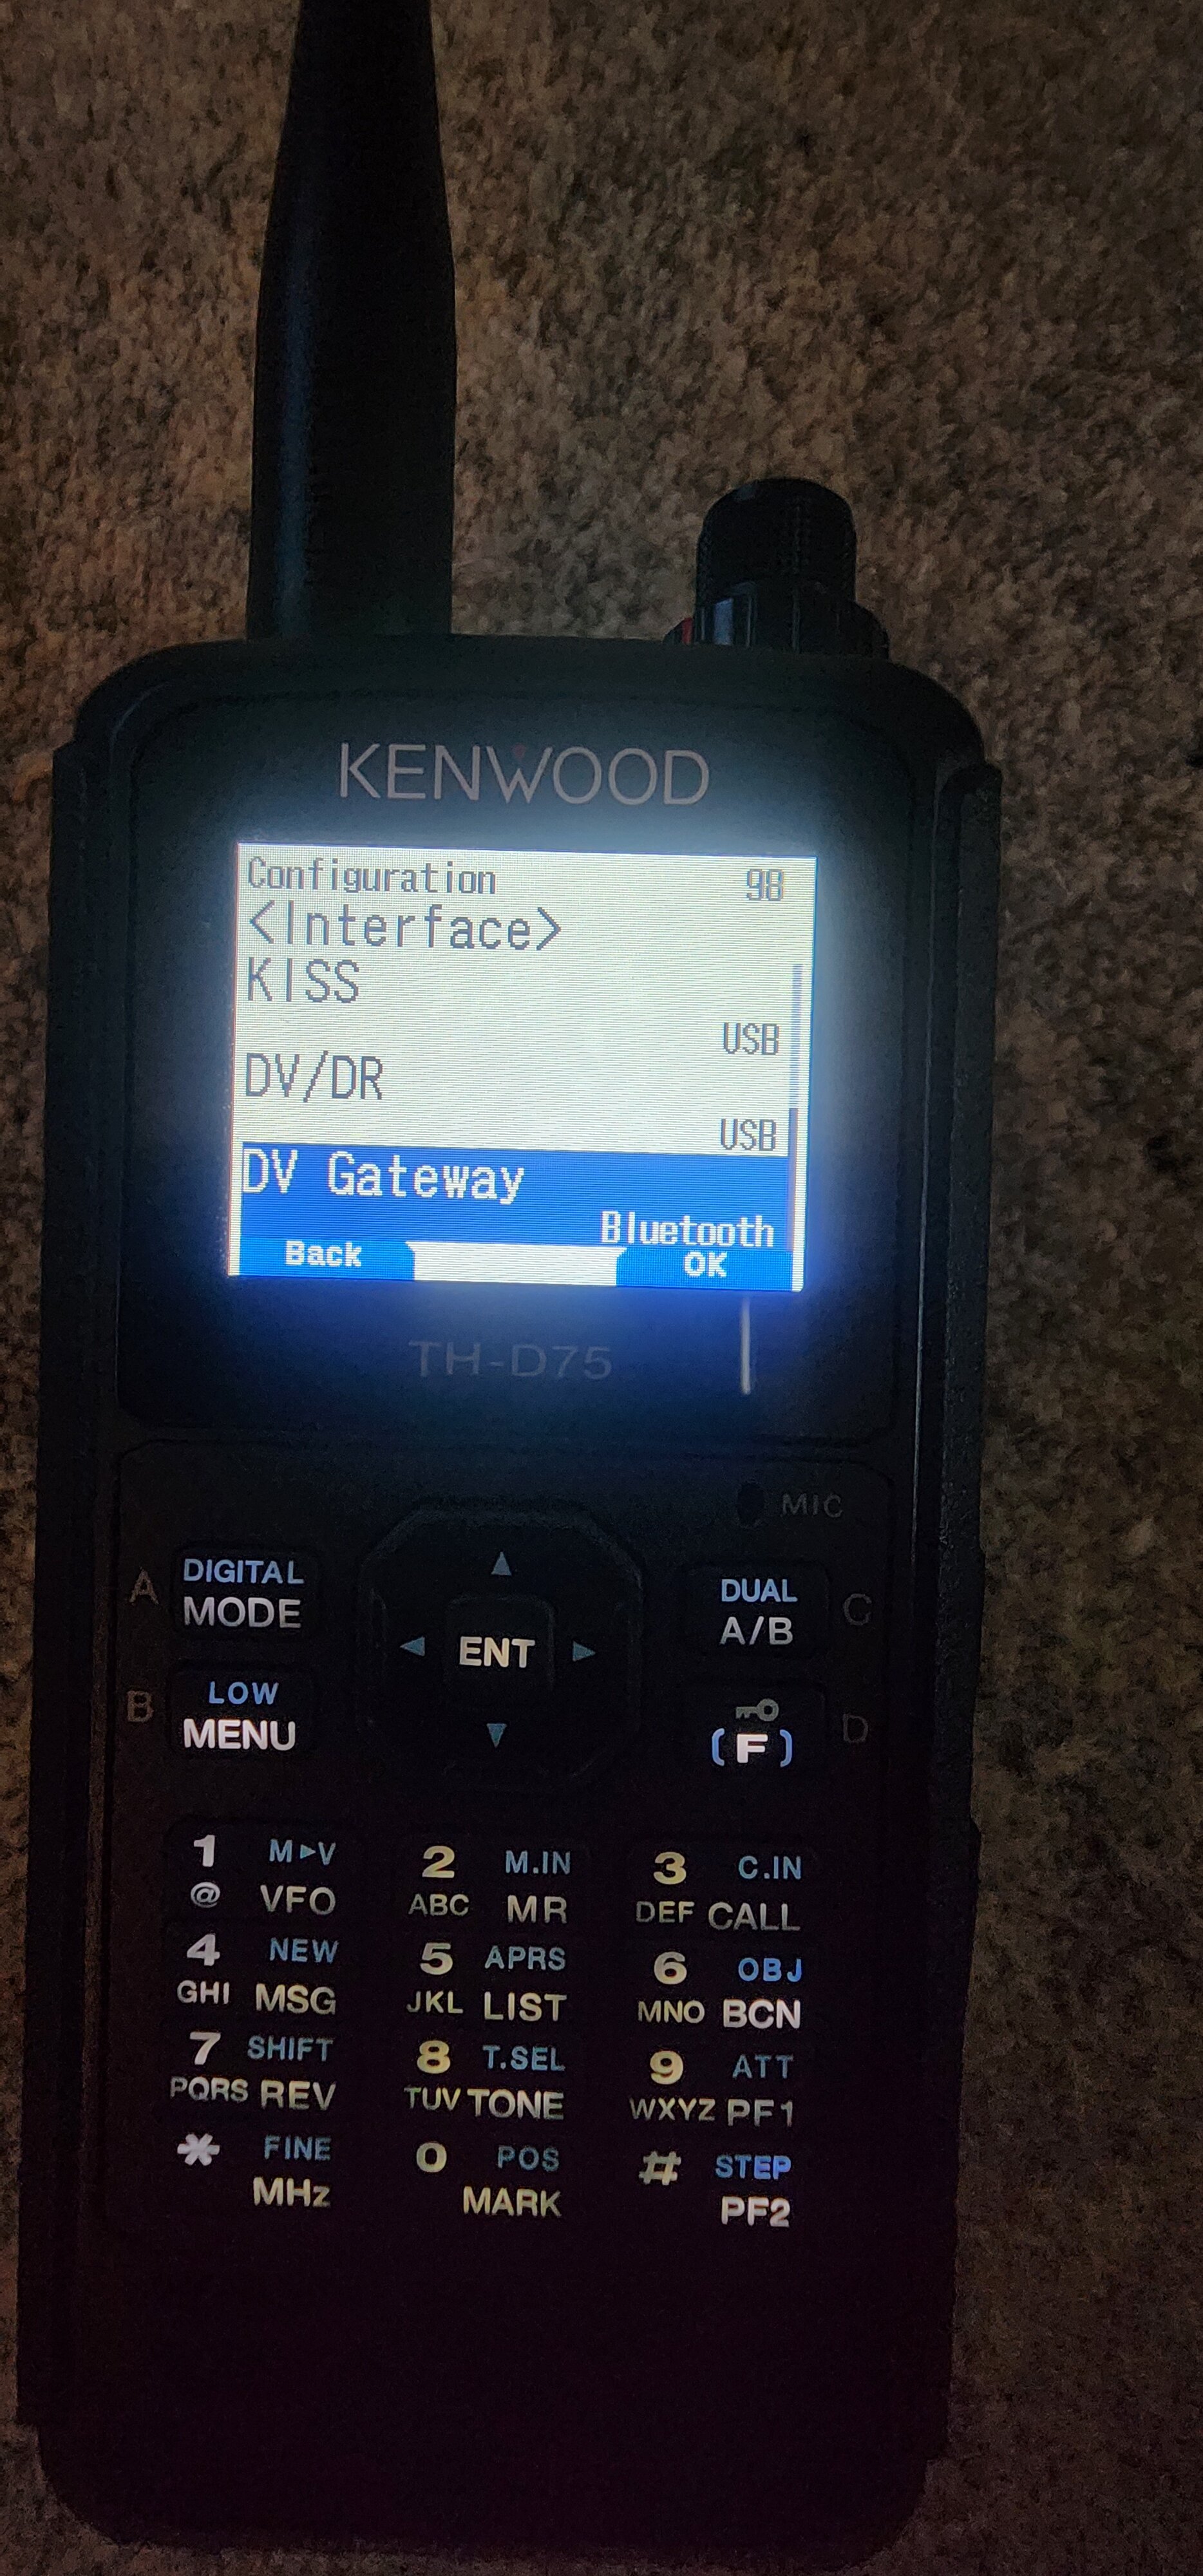
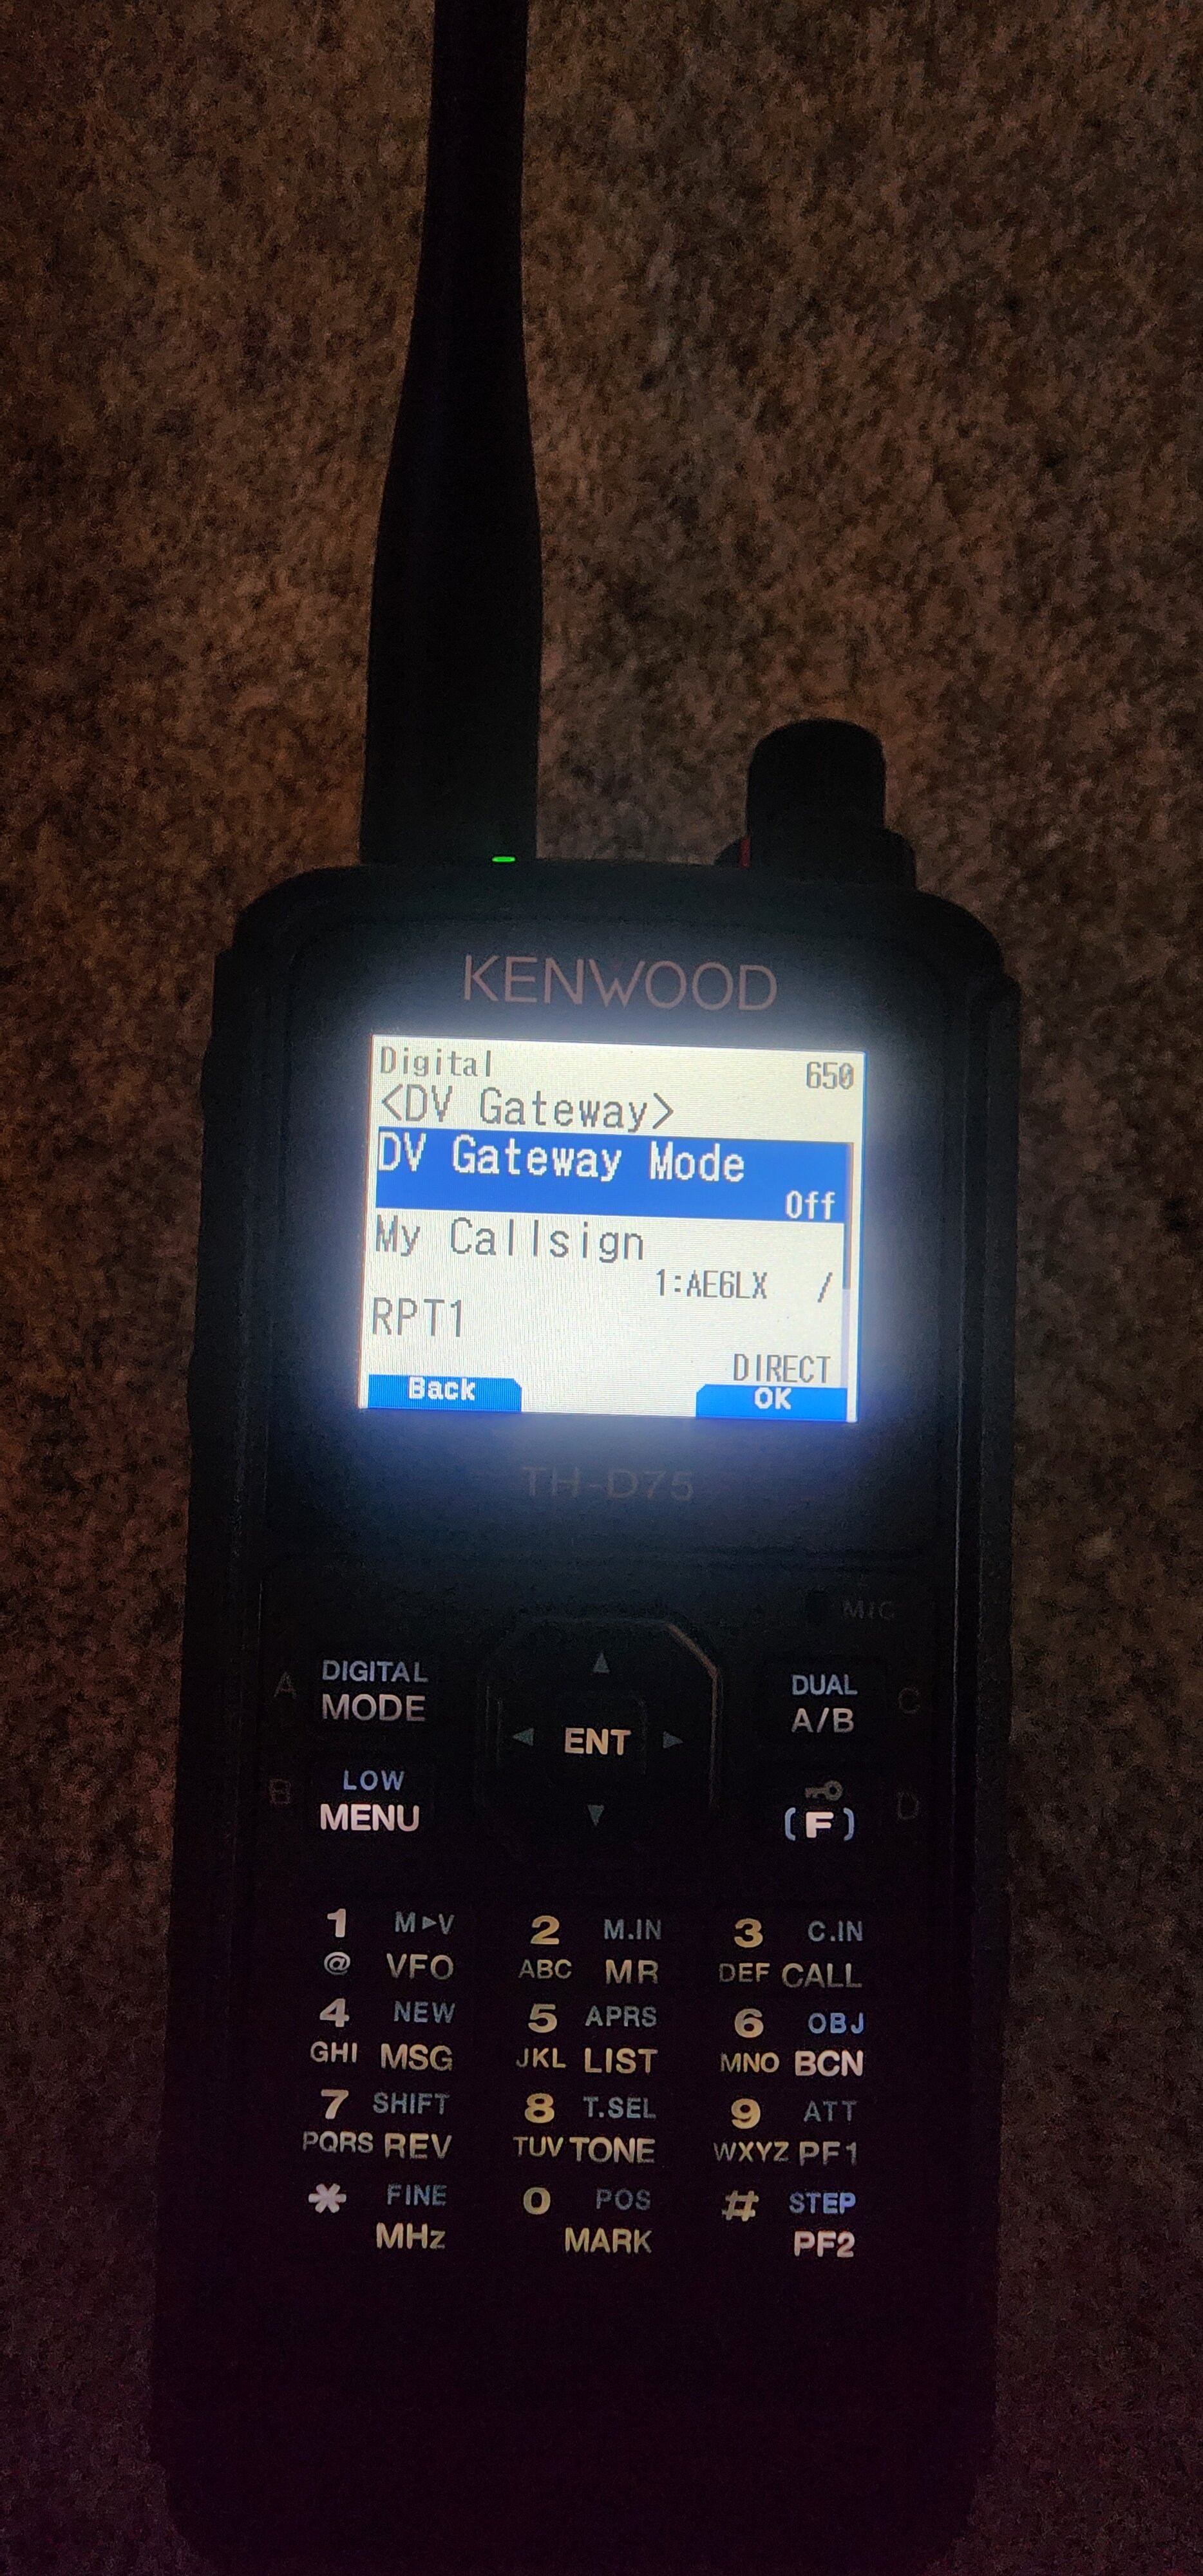
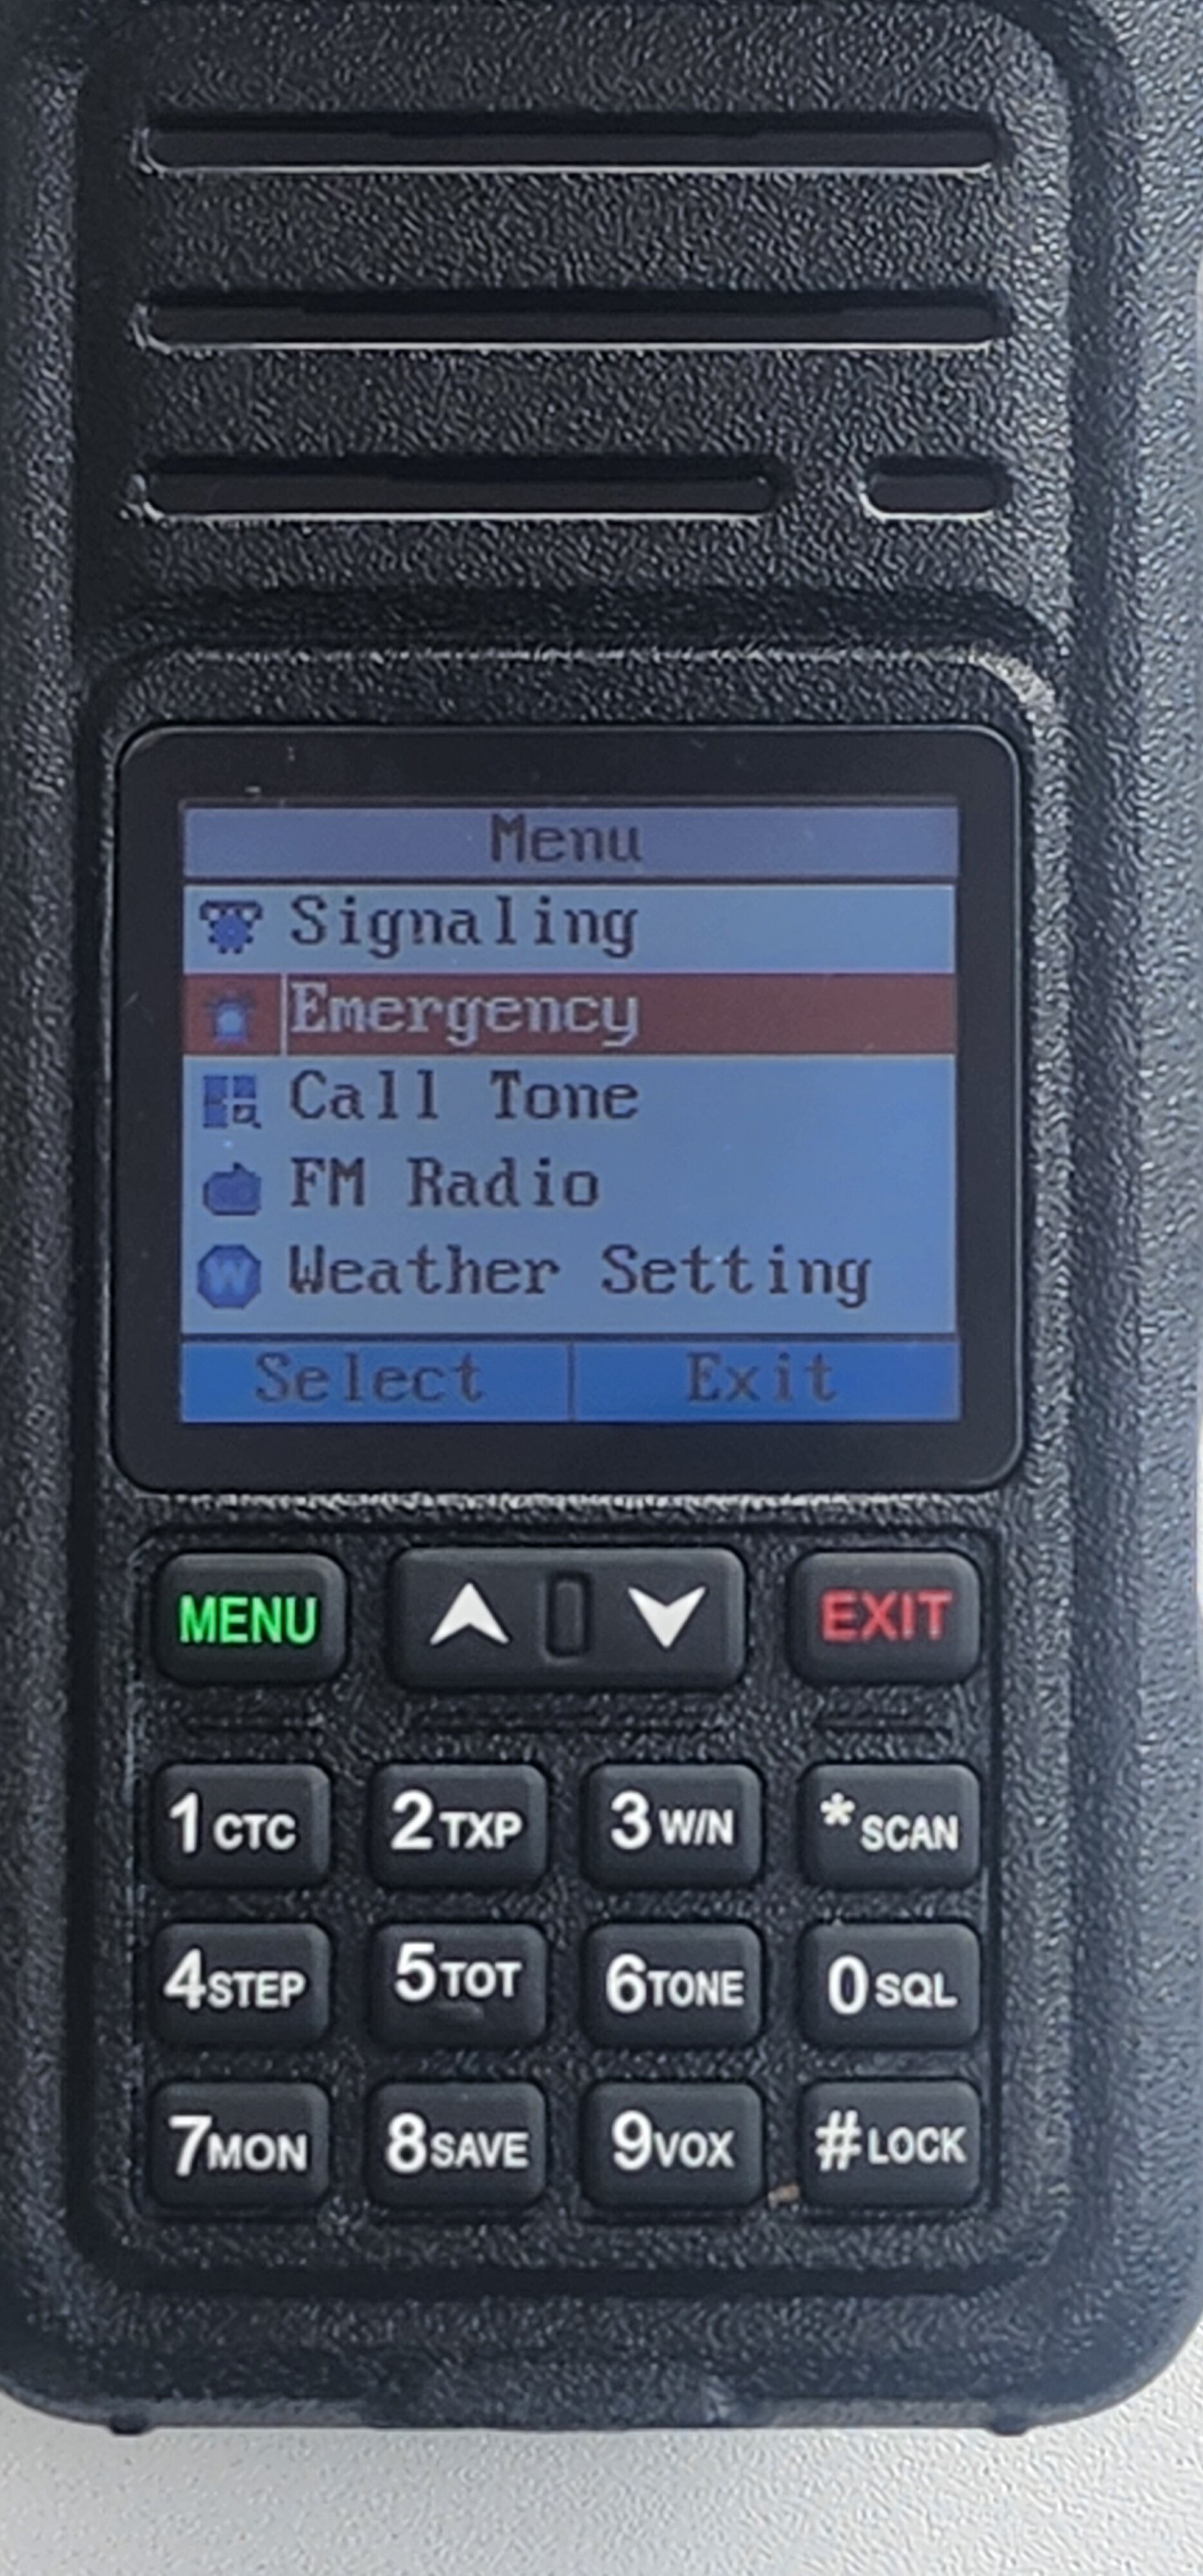
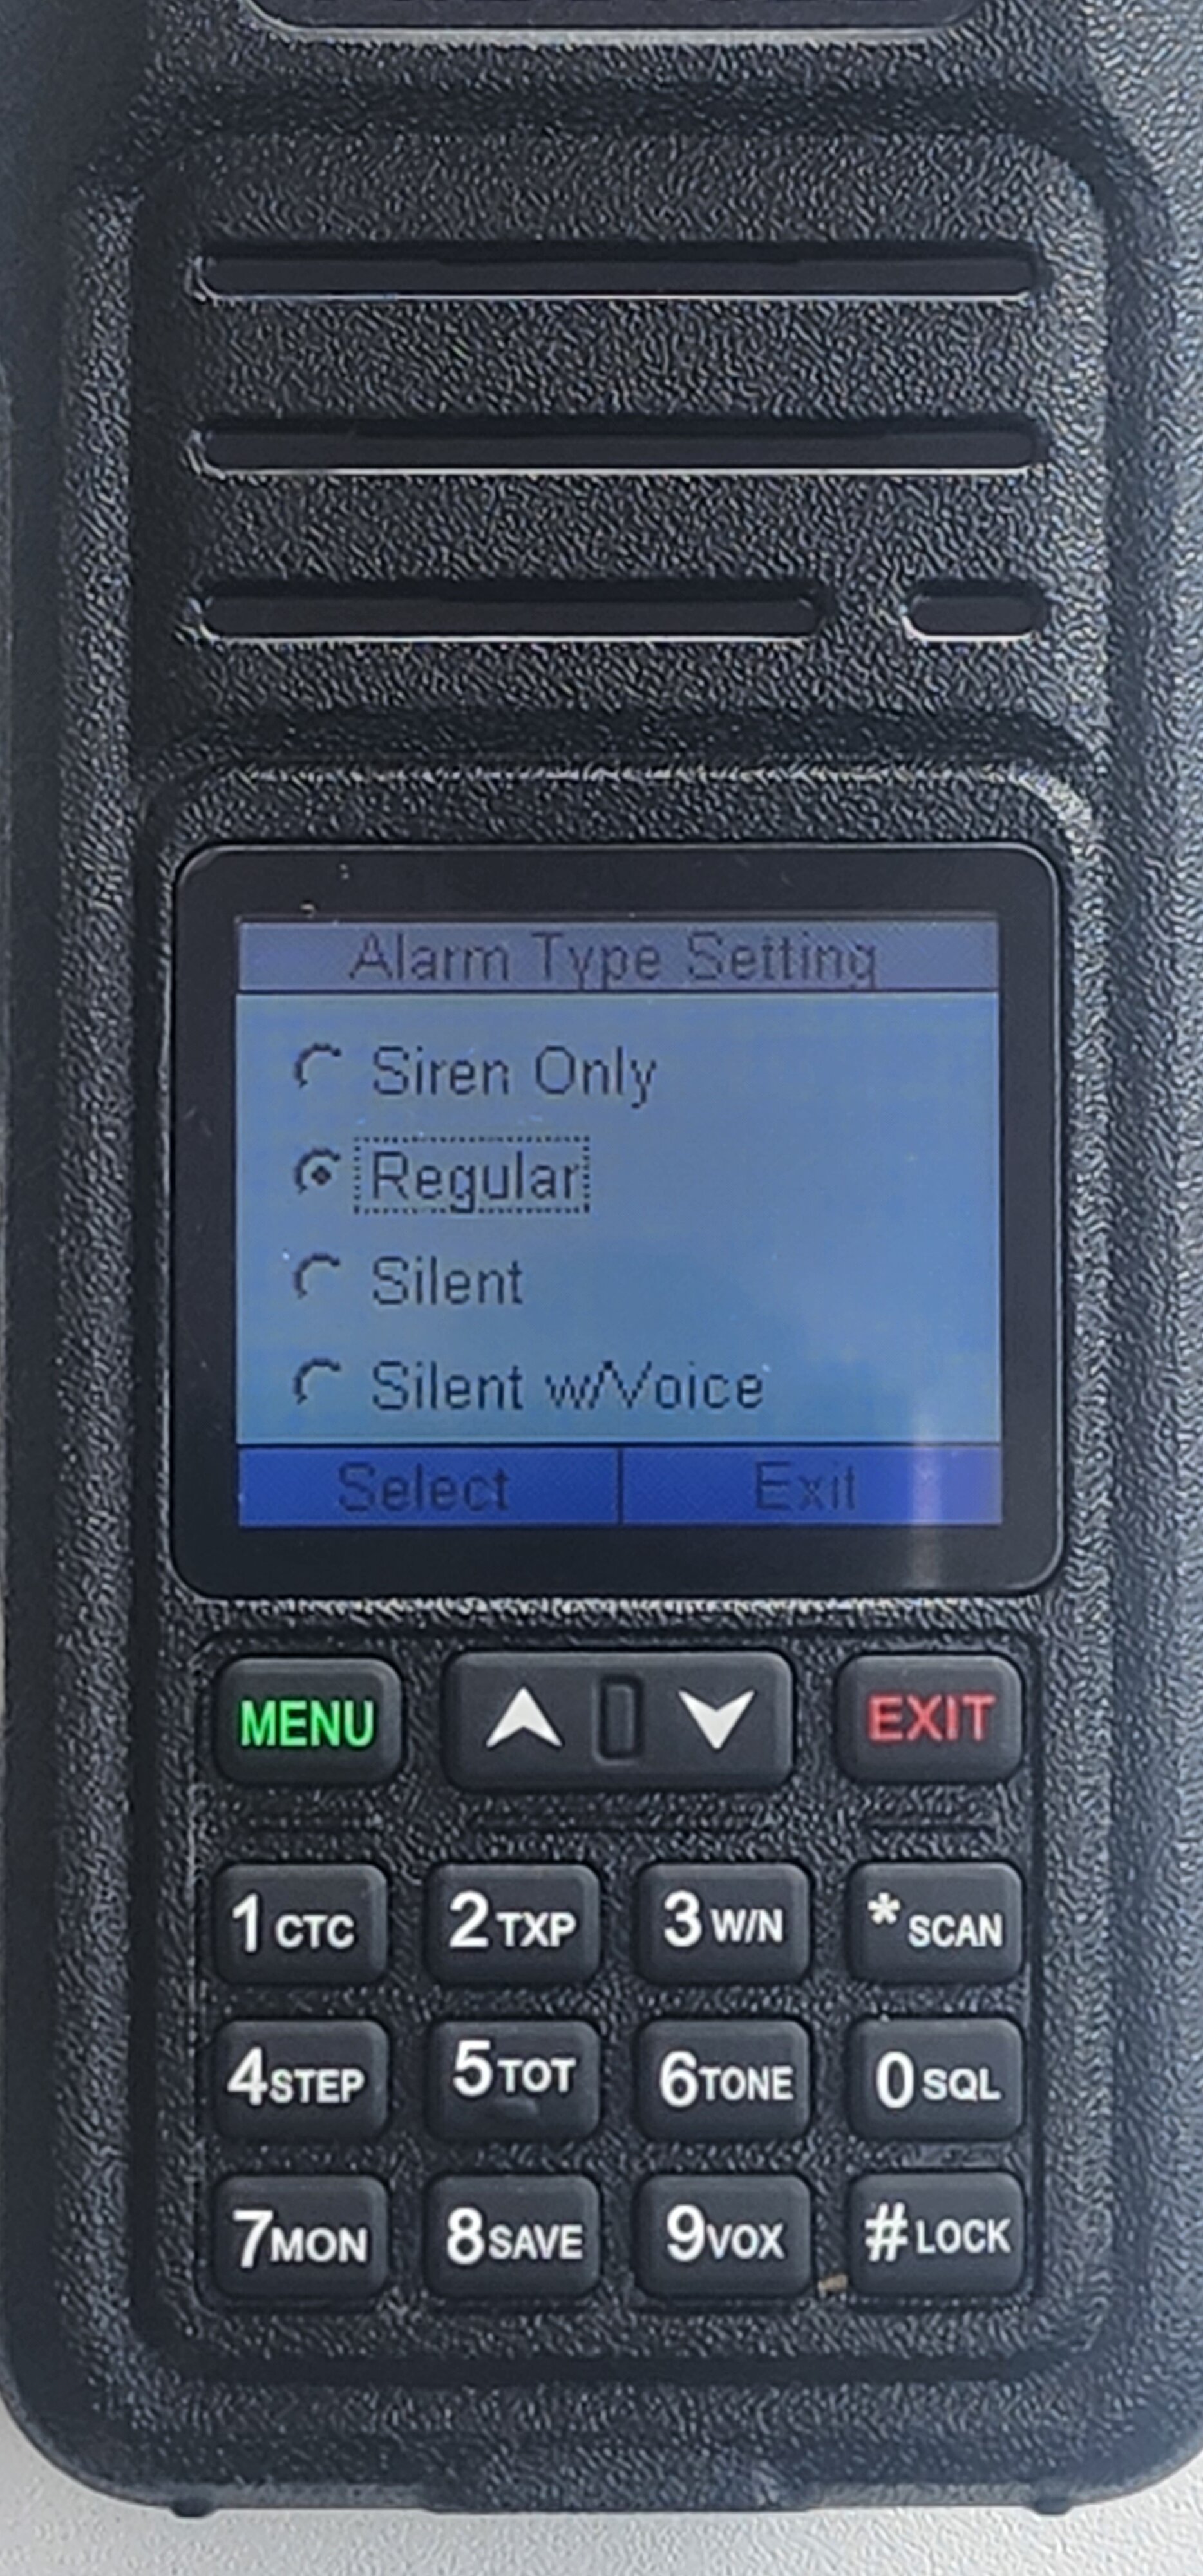
A major new function is the ability for the radio to work with a "DV Gateway" via USB or Bluetooth. In short, this means you can use a phone, tablet, or PC while interfaced to the TH-D75 to work D-Star over the internet without an additional RF hotspot. I tested this feature using the app "BlueDV Connect" with my Samsung S22 Ultra using Bluetooth as the interface. Setting this up is pretty straight forward: First you pair the phone/PC with the radio (the default bluetooth device name is simply "TH-D75". You need to set the "DV Gateway" setting to "Bluetooth" in the radio's "Interface" menu section:

full


Then when you're ready to operate, you set the "DV Gateway Mode" menu to "ON", but make sure you've input your callsign in this menu section, as well:

full


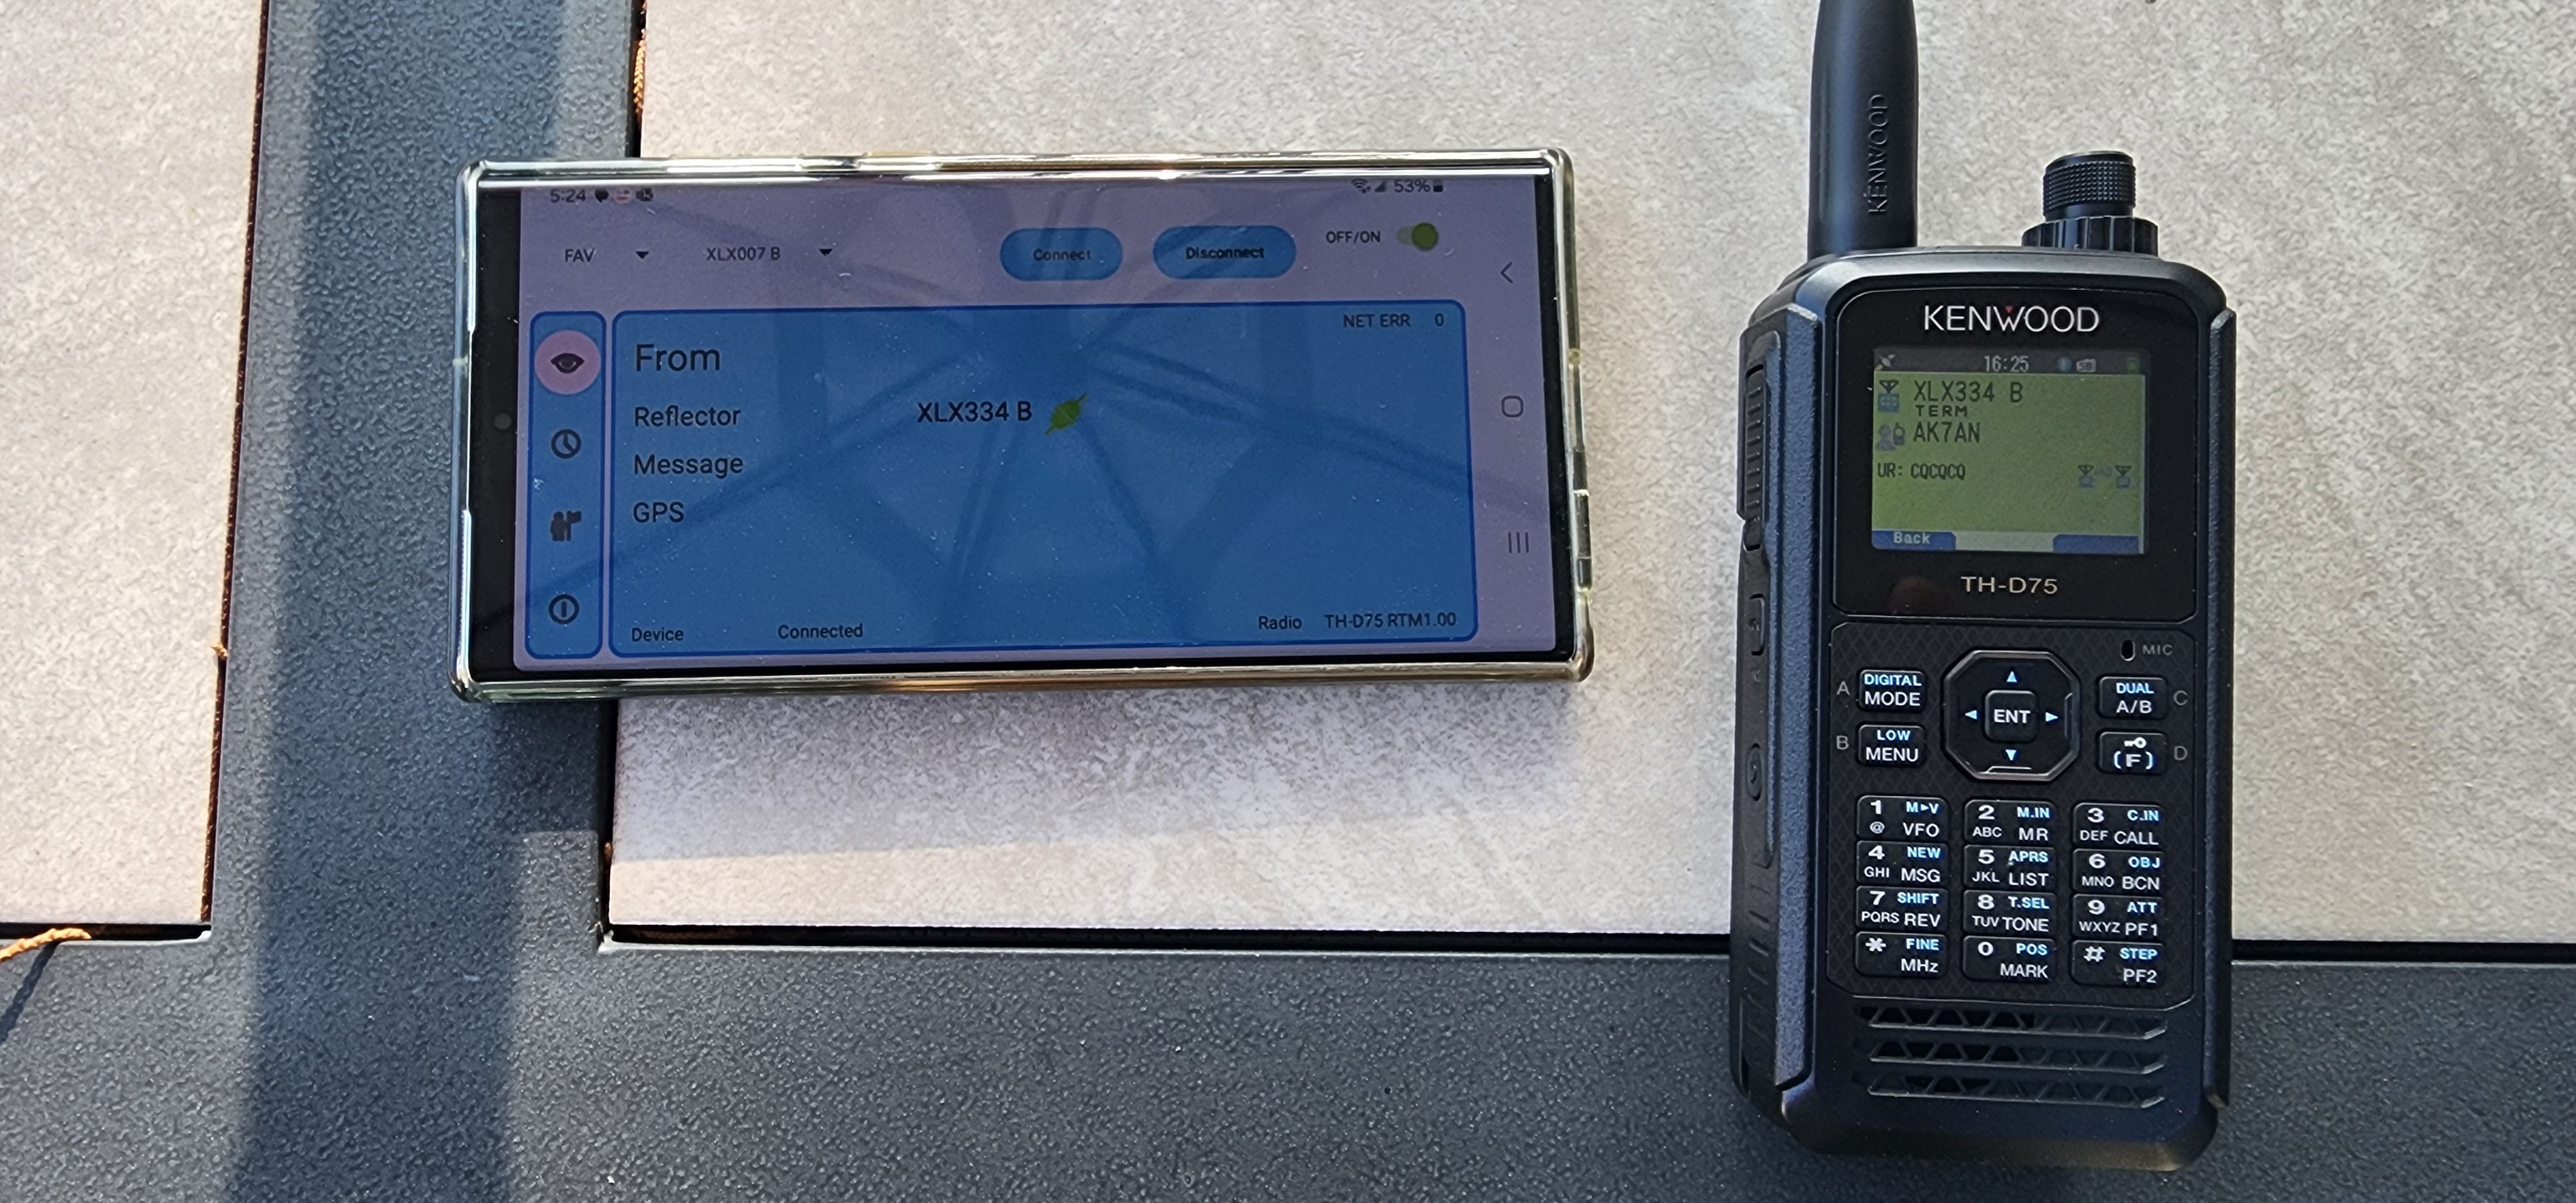
Lastly, in the BlueDV Connect app, toggle the top right on/off button to "On", which will initiate a bluetooth connection to the radio. (Hint: in BlueDV Connect, make sure you select the TH-D75 as the bluetooth device in the settings). Now that you've done this, you use the radio just like it's connected to a hotspot or internet, connecting to whatever reflectors or repeaters desired. Here's a pic of my phone and TH-D75 connected to an AlabamaLink reflector:

full


APRS Digipeater
Another new feature of the TH-D75 is the ability to act as a digipeater. This is useful when setting up a fill-in digitpeater or even an ad-hoc portable event where you might have the need to track multiple station locations. The radio fully supports UITRACE and UIFLOOD addressing; the configuration of the digipeater will be reserved for a future article.
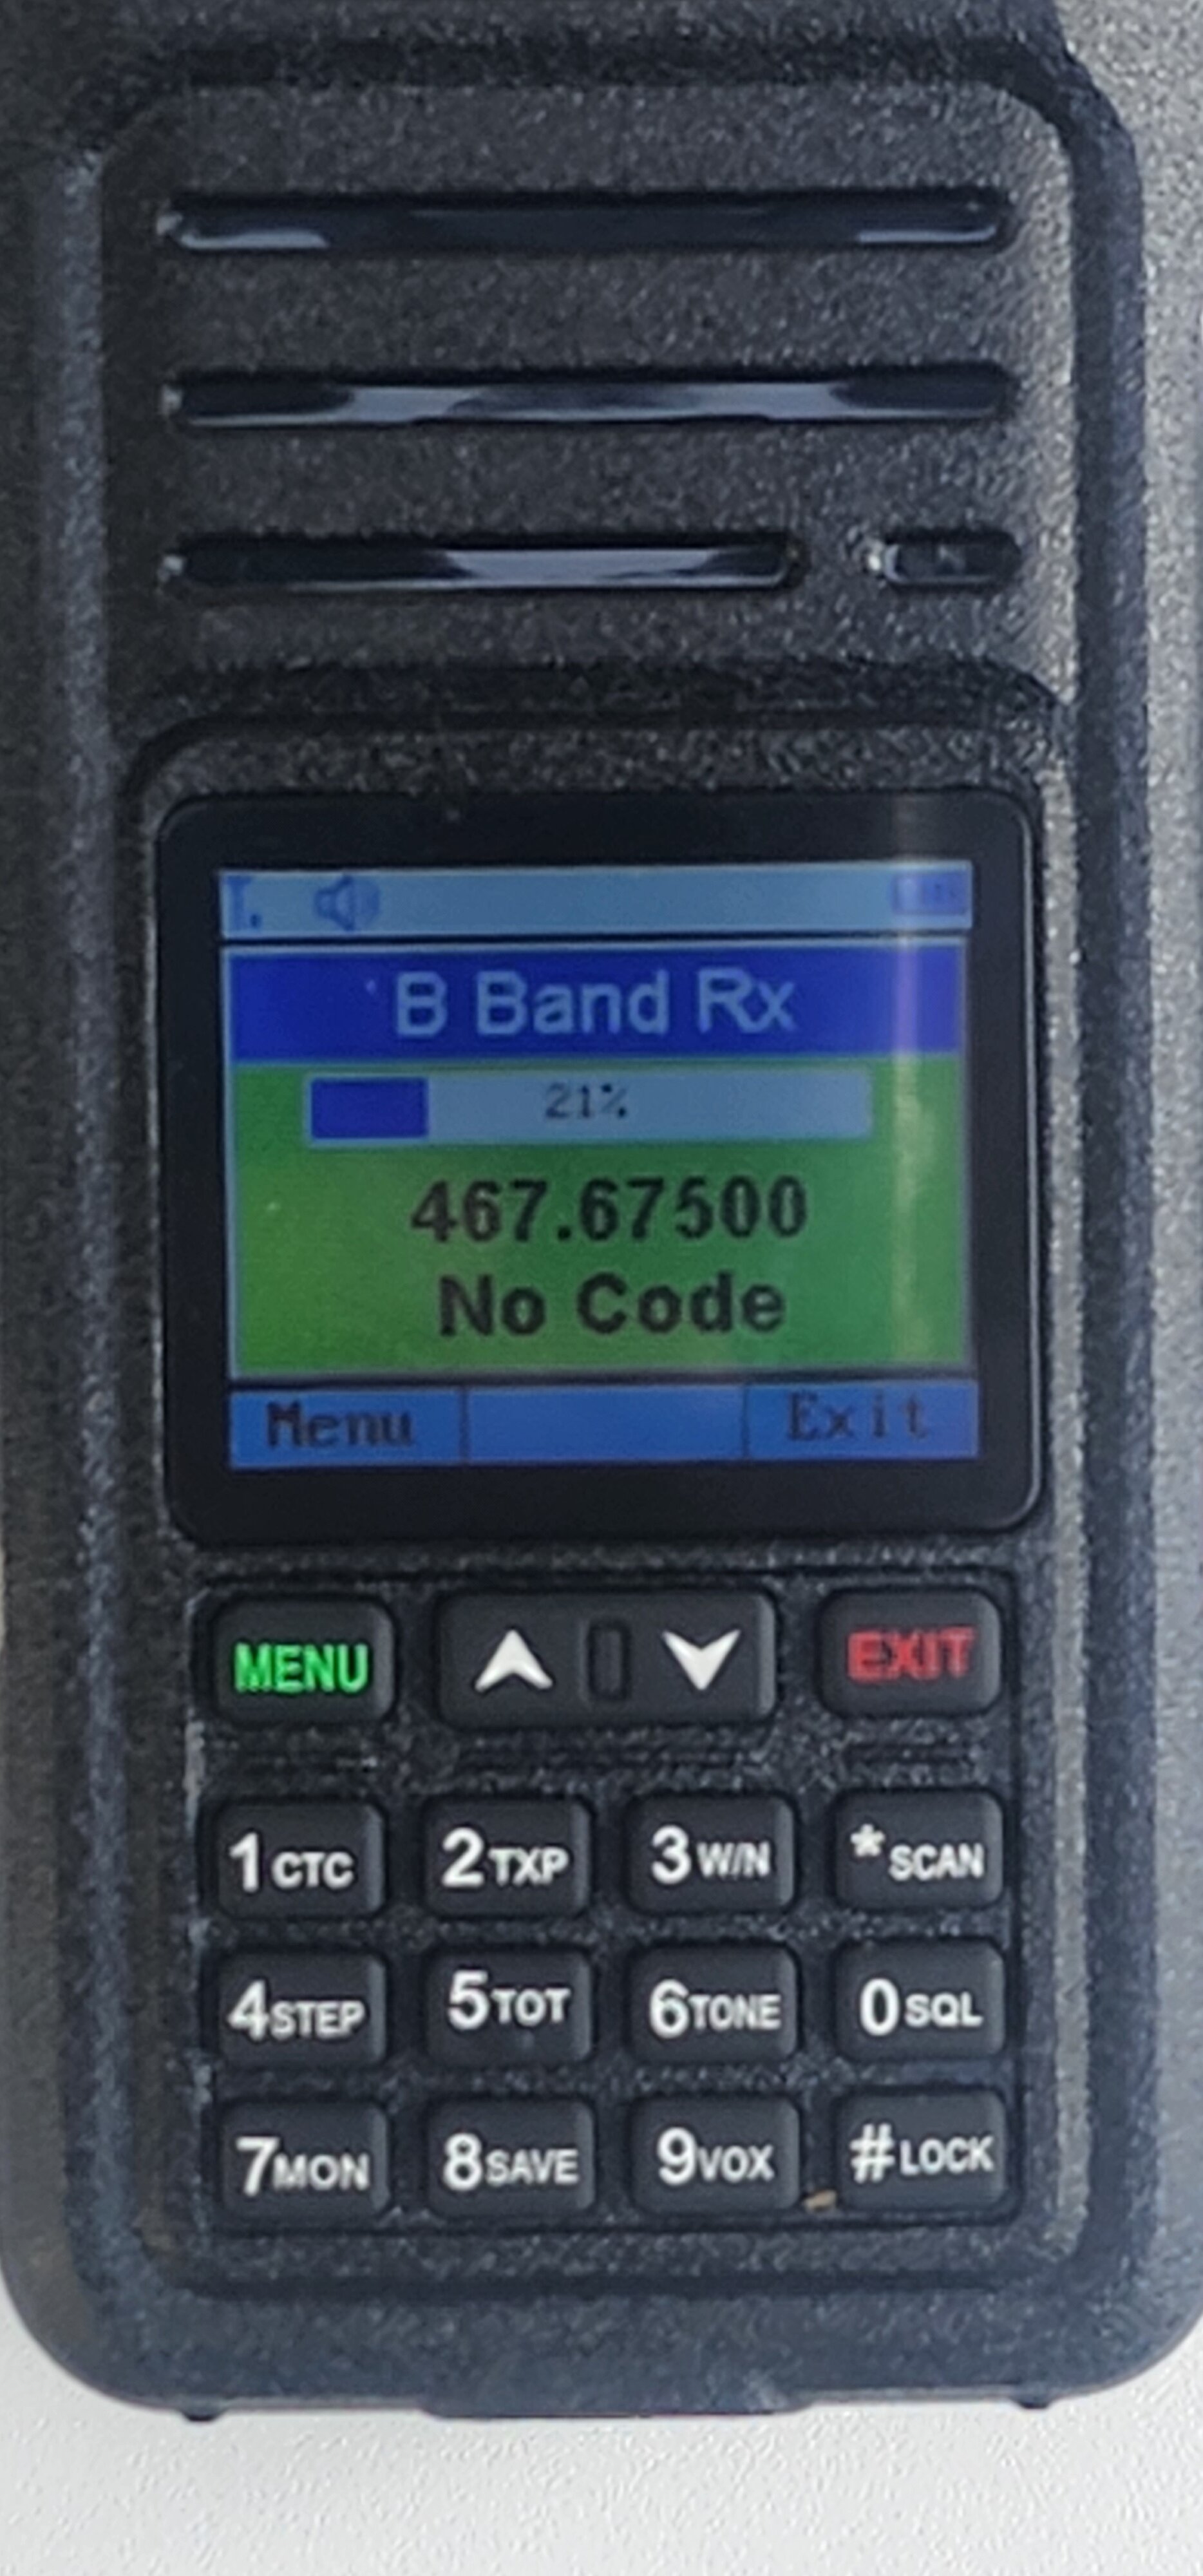
Multi DV/DR RX
The last major addition to the TH-D75 is the ability to monitor digital modes on both A & B bands. In my opinion, this is a nice-to have feature, but I could see how it might be nice to monitor a simplex or local repeater frequency and a hotspot reflector at the same time. Note that the DV Gateway feature only works on the B band and does not support the dual DV/DR receive feature.

Programming
Since I already had the TH-D74, my first curiosity was if I could simply import the old radio settings and memories into the new TH-D75. The good news is that the free MCP-D75 application can open memory lists from the MCP-D74 application, preserving memory groups, names, repeaters, etc. The bad news is that the radio settings cannot be imported. However, it didn't take too much time to simply open both applications and copy/paste or cross reference the relevant settings between the two radios. I lobbed an email into RT Systems to see if their app could more seamlessly import a TH-D74 config, but the answer to that was "No", as well. I will still likely buy the RT Systems app simply because I find it super convenient to query and download online repeater sites to dump a new city/location into a new file that I can save on to the SD Card. I will also use this radio as a race scanner at racing events (such as NASCAR), and maintaining scanner frequencies with the RT Systems app is just so much easier. (If you're not familiar with Racing on the Air events, check it out!)

Summary
While I've focused on new features, don't forget that the Kenwood TH-D75 is jam packed with stuff simply not found in other VHF/UHF radios - mobile or handheld. You get 144/220/440 bands for TX/RX, air band, AM/FM broadcast radio and all-mode (CW, AM, FM, USB, LSB) HF, MW, and SW reception. It has built-in GPS with the ability to record waypoints. You can record reception to the SD Card or to an external device via USB. Bluetooth supports the Headset Profile, which means it will work with a variety of devices, including motorcycle headsets. And don't forget about the TX/RX equalizer for both FM And DV modes. Yes, the radio is pricey, but this is literally the Porsche of VHF/UHF ham radios.
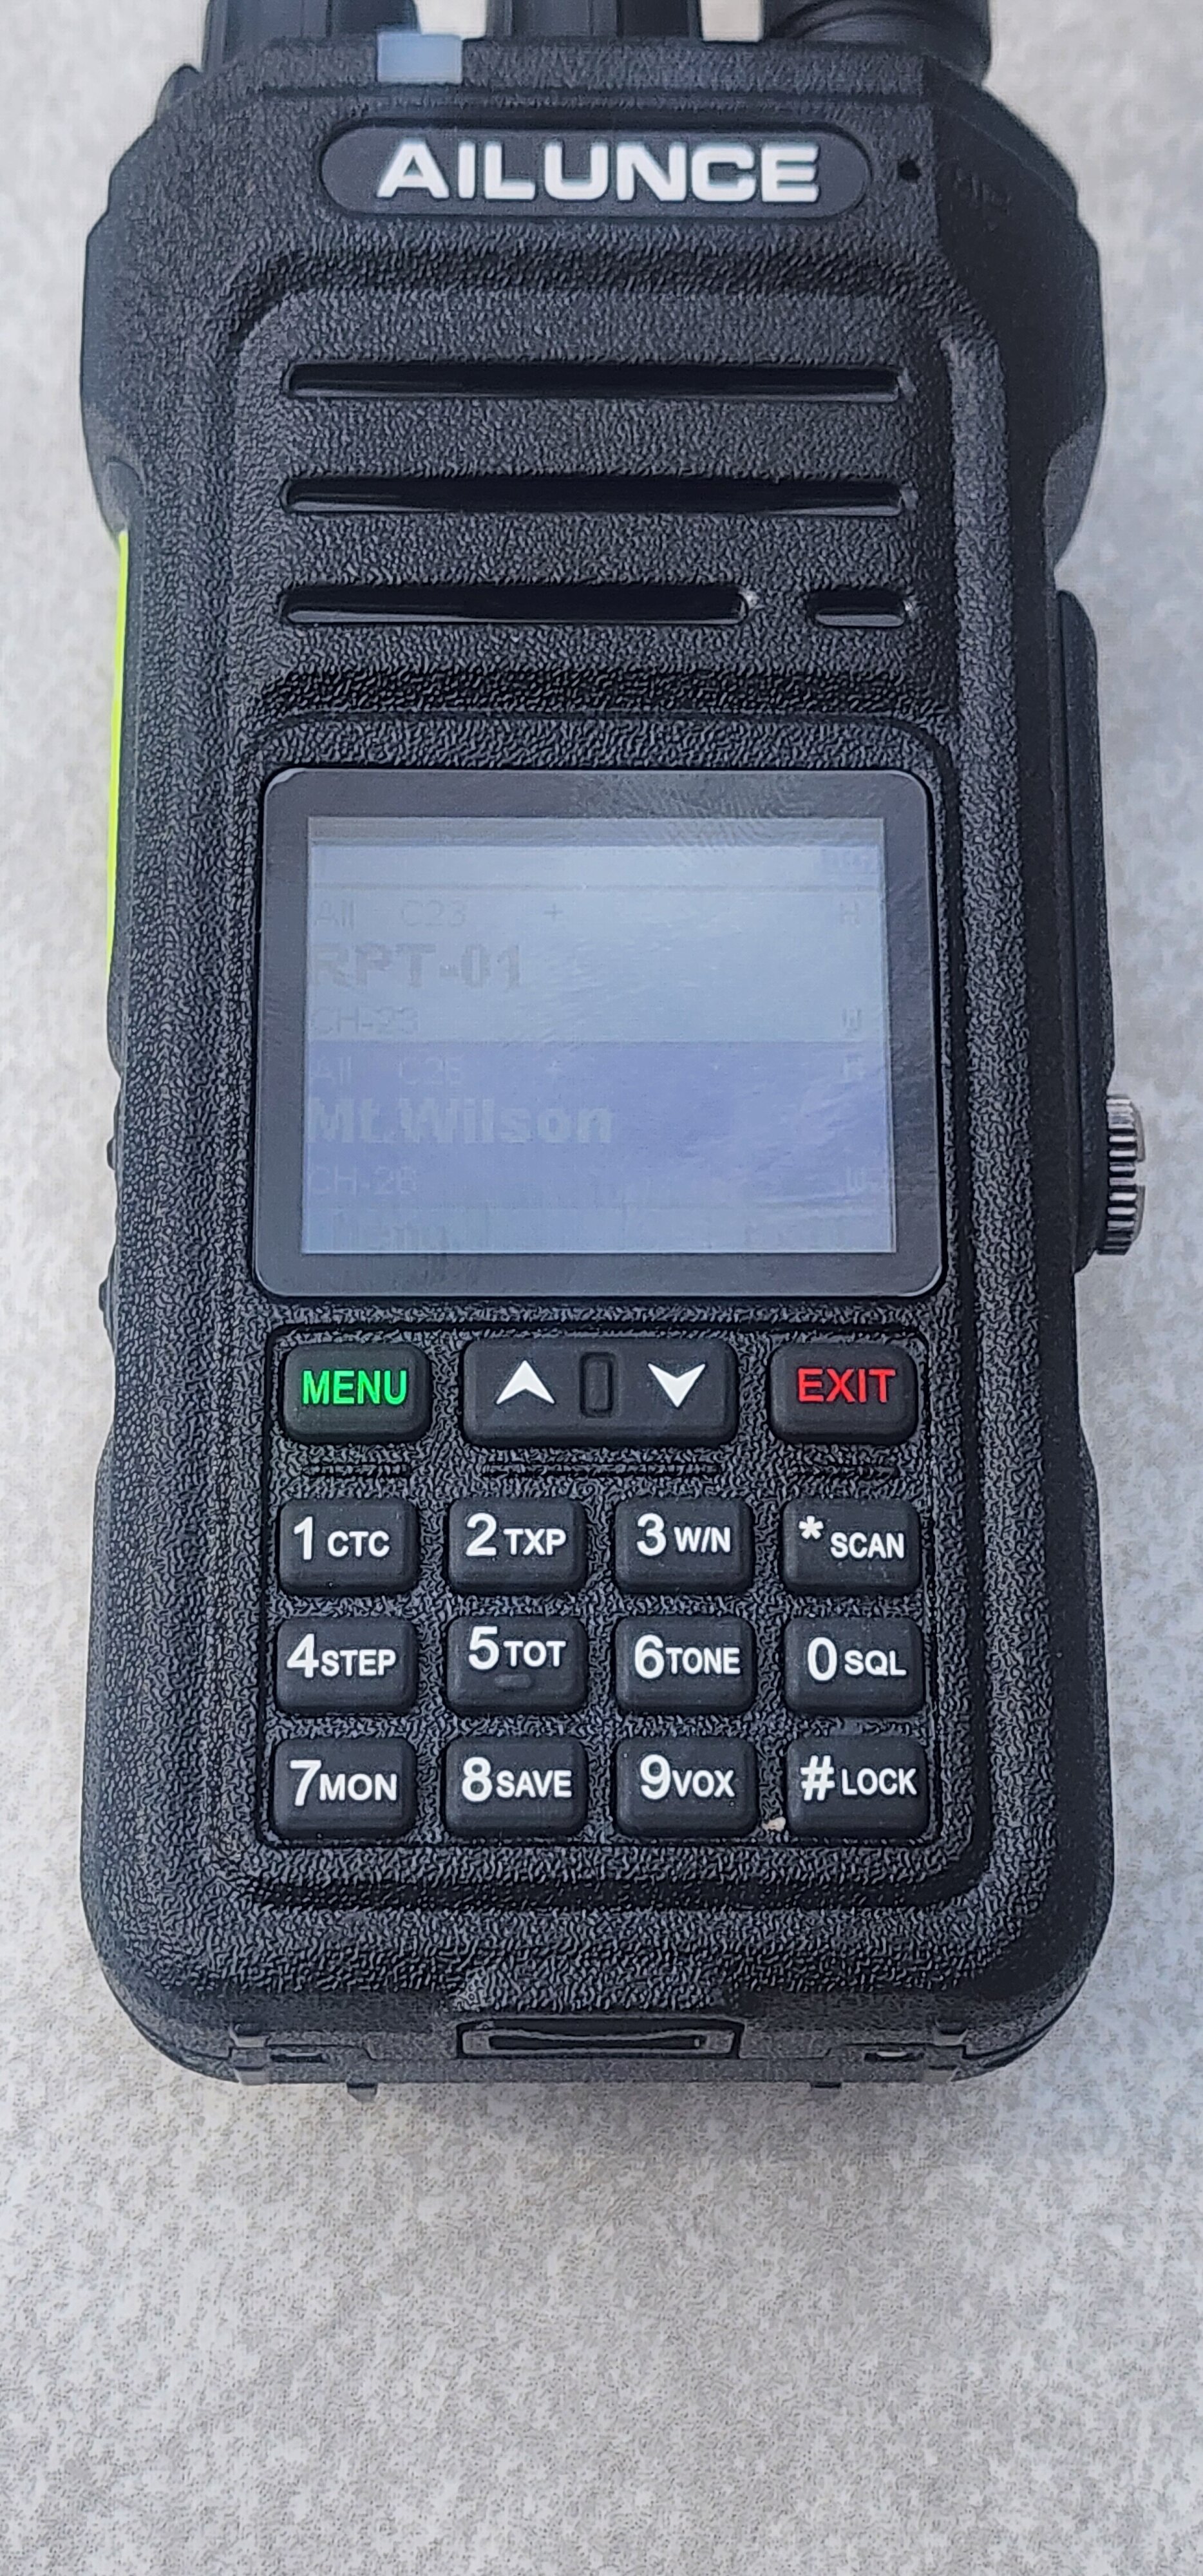
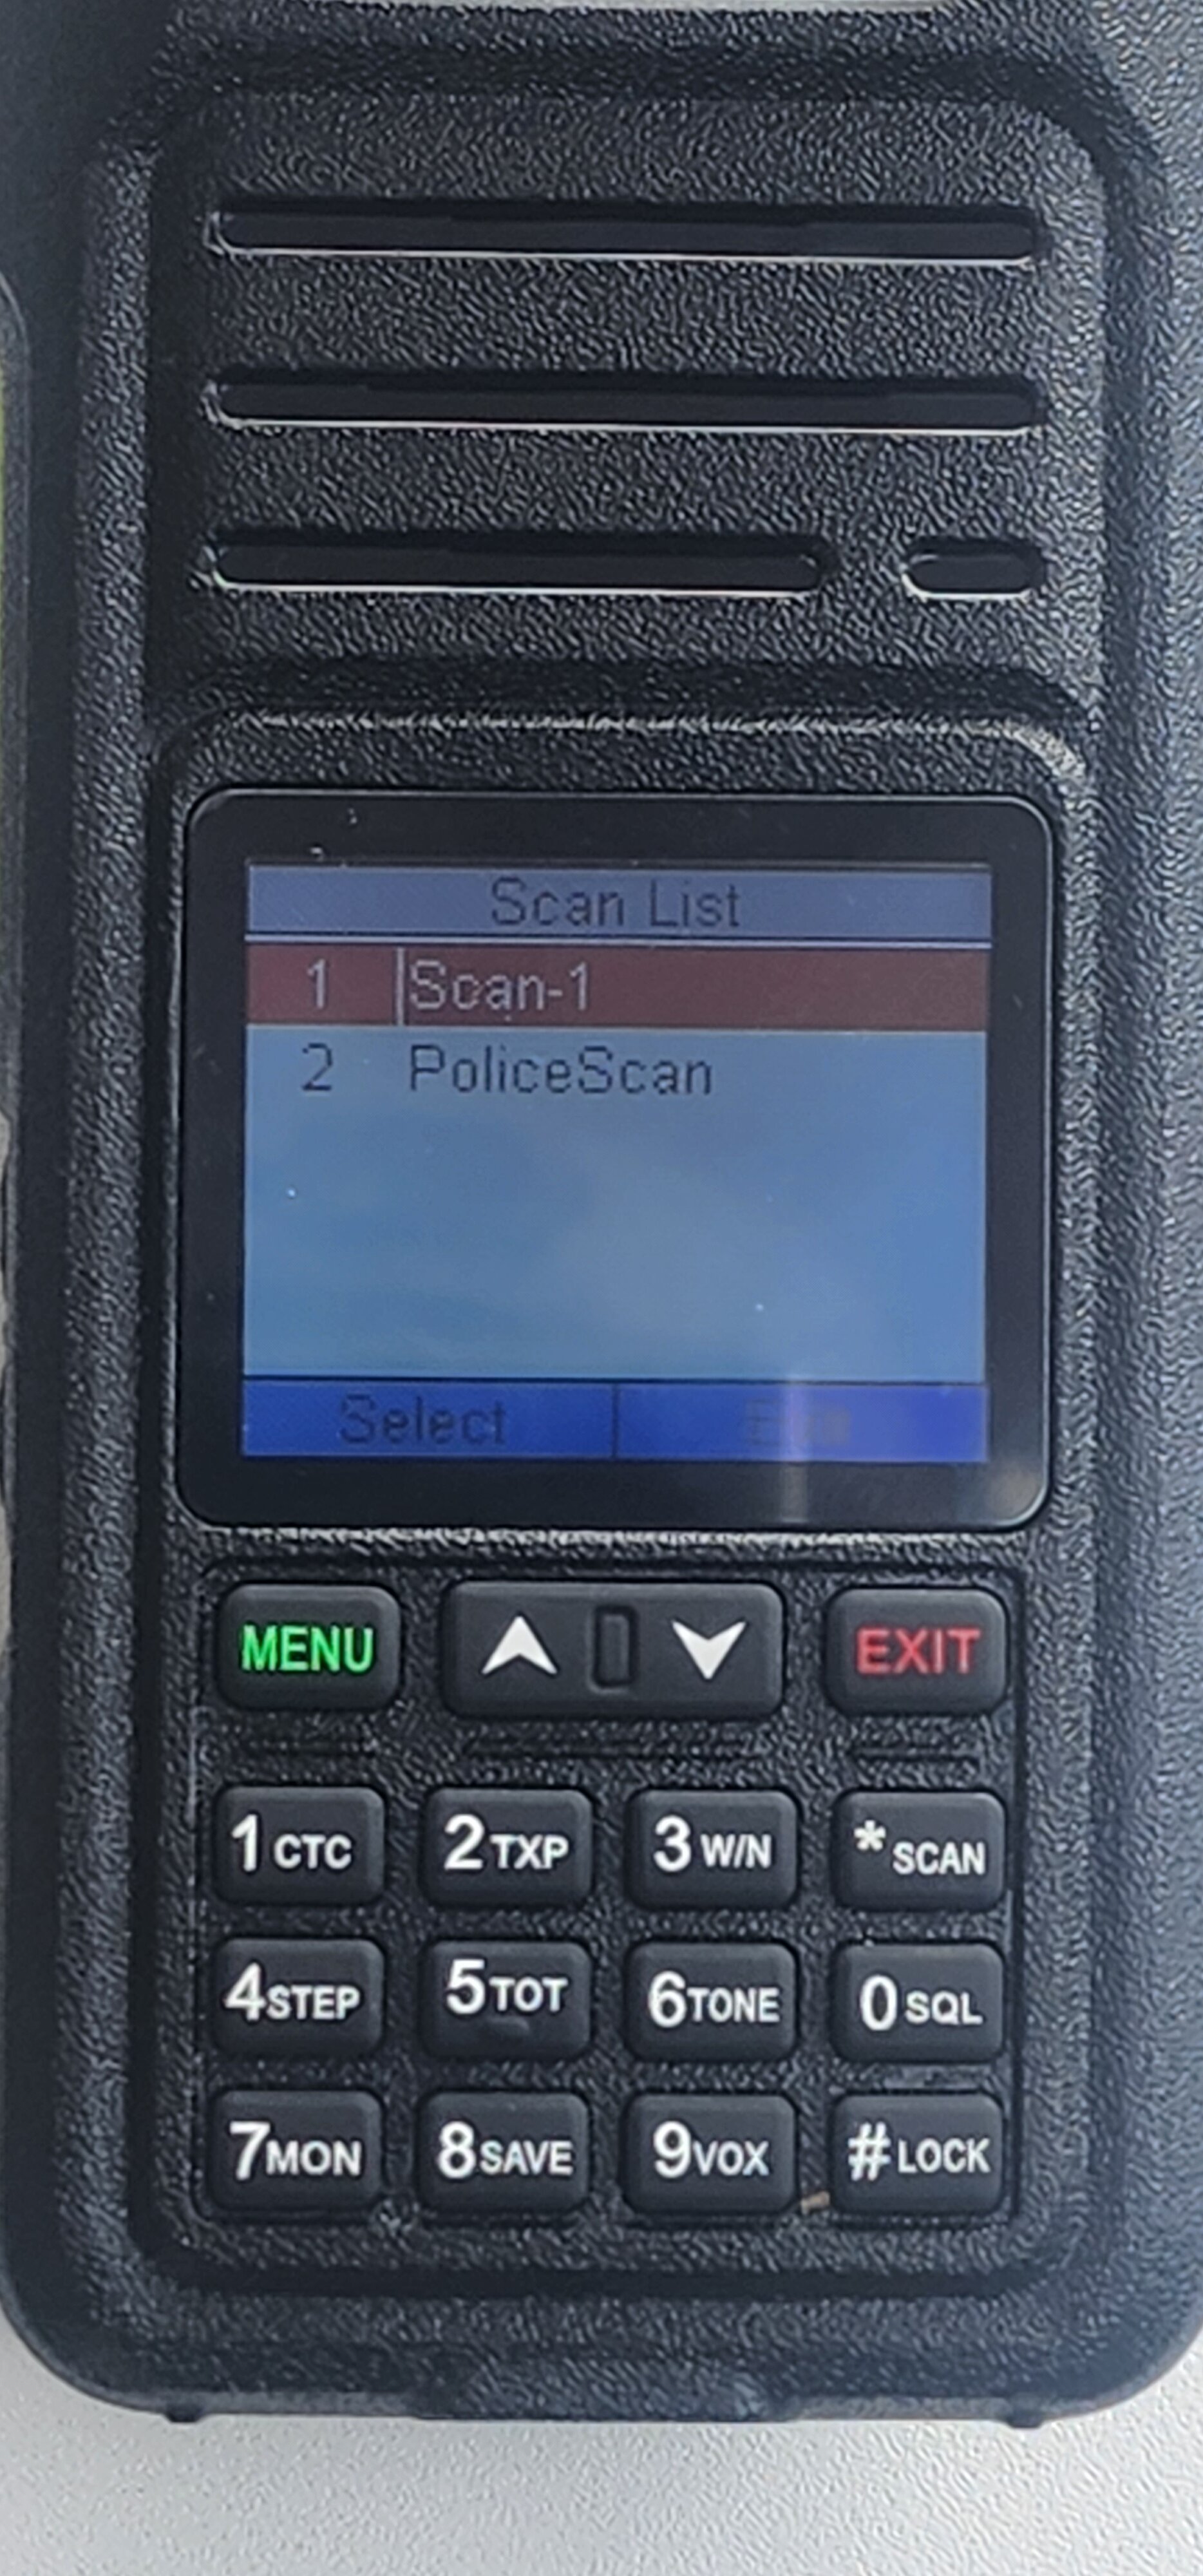
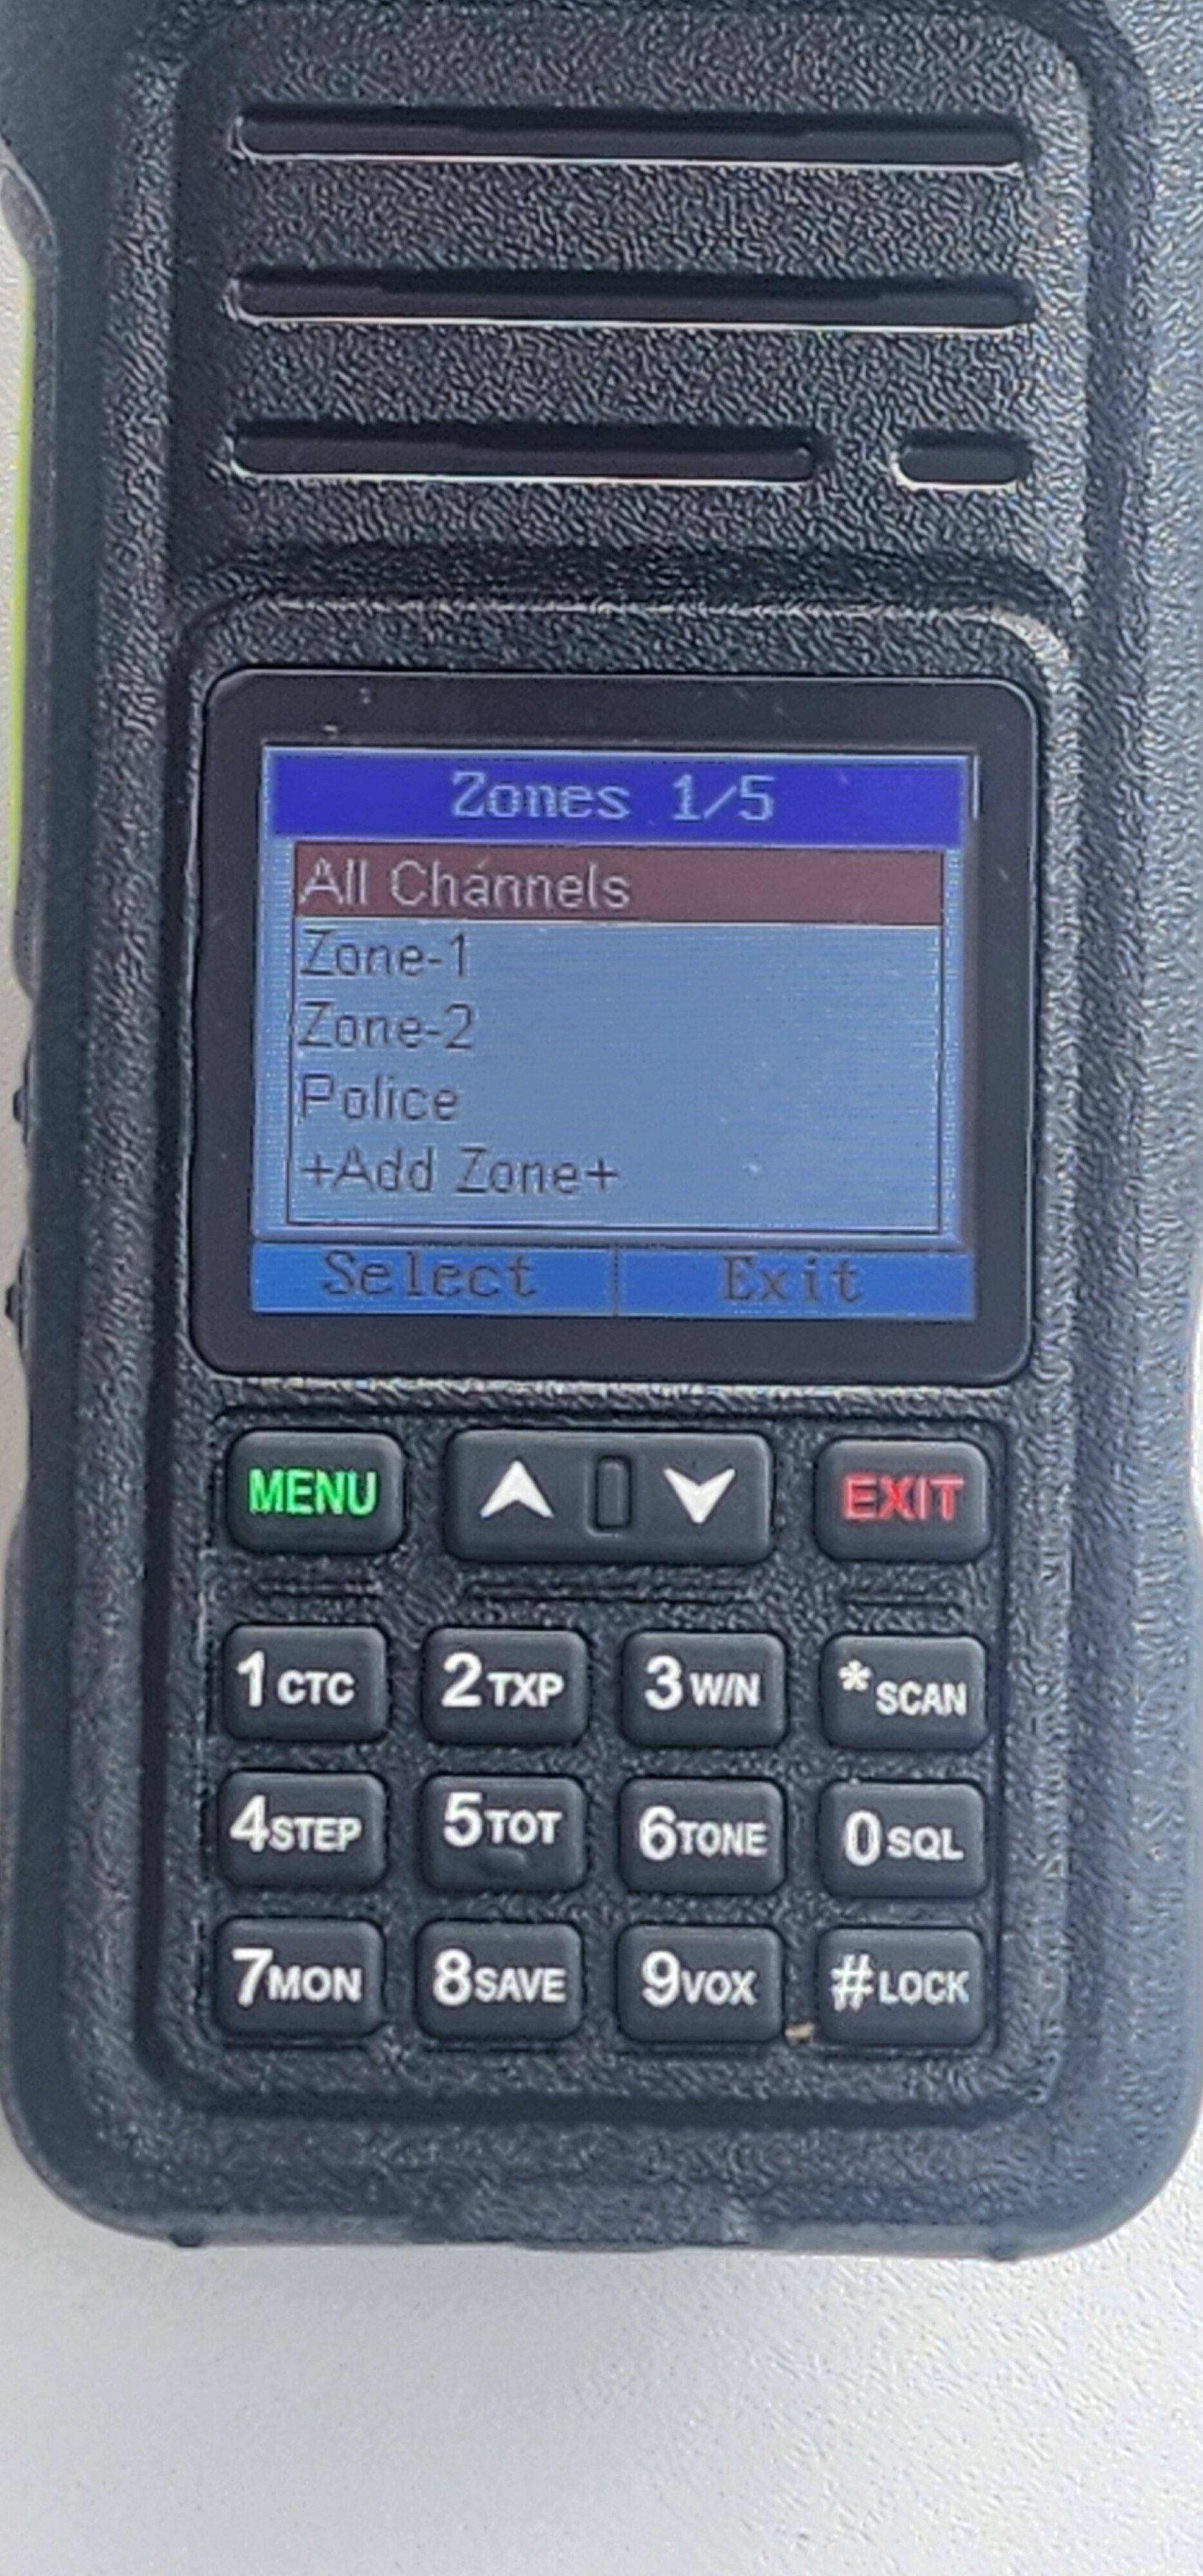
Quansheng UV-K5 Full Band HD Modification

The Quansheng UV-K5 has rapidly developed a reputation at the most "hackable" radio on the market today. There are many firmware variants available produced by the ham community, and more seem to come every week. Now, a daughterboard is available that opens up the radio for full HF/MW/SW/LW reception, which also includes AM/FM/SSB modes, as well as broadcast HD FM. One of my local hams purchased the kit and did a photoshoot of the install, which he shared with me for publication.

Here's a photo of the entire kit, available on ebay for about $10. The base of the radio in the picture gives you an idea of the size of the components:

full


Here's a link to the item on ebay:


This is another picture for reference on how small the daughterboard is:

full


Installing requires disassembly of the radio and removal of the main board, which is pretty simple. This is the main board before modification:

full


And here is the main board after the daughterboard has been installed. Note the added resistor toward the bottom right of the image. The new board is just above the keypad, labeled UVK5 S14732".

full


After reassembly, you need to install new firmware that will take advantage of the board. The download is here: http://www.hamskey.com/2024/03/introduction-to-uv-k5-hf-fullband.html. Here is a pic of the radio receiving on 11M, channel 38 LSB:

full


And finally, a video clip of the radio receiving broadcast FM:


One thing to know is that there is some tiny SMD work involved with installing the kit, but it shouldn't be too difficult with the correct soldering tip. If you don't already own the Quansheng UV-5r, they're about $35 from ebay; less if you want to order direct from China:

https://www.ebay.com/itm/1345355609...pid=5336136228&customid=&toolid=10001&mkevt=1

Or if preferred, the radio can be purchased on Amazon:
https://amzn.to/4ap6FvA

Enjoy!

Retevis Ailunce HA1G GMRS IP67 Handheld Review

Retevis recently contacted me and asked if I would review their new Ailunce HA1G GMRS handheld radio. Of course, I can't turn down an opportunity to play with a new radio! Here's a deep dive into this new radio, highlighting the major features.

The first thing to know is that the HA1G is dust proof and water proof as indicated by the IP67 rating. This rating means that it can survive submerged in 1 meter of water for 30 minutes. I have not tested this rating yet, but I have no doubt that it is valid after testing another radio from Retevis with a similar rating that survived the Pacific Ocean surf. The HA1G comes with all of the typical accessories that you expect. The package I received did not come with an external speaker/mic, but it includes the typical desk charger, programming cable, USB cable, belt clip, etc.

full


You don't need to use the desktop charger to charge battery because the battery has a USB-C port. Because this port is attached to the battery, it is only used for charging and not programming. Also, my tests found that using a PD (Power Delivery) USB-C port did not work; you need to use a standard 5v USB power source.


full


The HA1G has a lot of advanced features that you typically only see in ham or commercial radios. The high / low power setting is defaulted to the maximum FCC power allowed on each frequency for a handheld but you always set the power to low whenever designed. According to my tests using a Bird 43 meter and 400Mhz element, the radio puts out nearly 6 watts on High and just about 1 watt on Low. The radio has a Wide / Narrow setting to set the TX/RX bandwidth accordingly. Time out timer, VOX, and Mic Gain, FM radio and NOAA WX are all included.

The HA1G is VERY rugged and design choices have been made to enhance its durability, such as the decision to use a Motorola-style speaker/mic connection on the side instead of the more common K2 connector. This is the same connector that is used with the programming cable, as well. This image has the side cover removed to expose the underlying connection. The way the battery is secured ensures that it won't pop out because of an accidental drop.

full


The PTT button is massive; you won't be able to accidentally miss it when picking up the radio to talk. Below the PTT button are two buttons that can programmed to respond to do different things based on a short or long press. One cool use for this is to make one of the soft buttons the Band A PTT and one the Band B PTT, regardless of which band is activated. Activating the built-in FM radio is a good function to program onto one of these buttons for long press (it comes like that from the factory). But you can literally program these buttons to do whatever you want.

full


When the radio transmits or receives, the screen changes to tell you which Band is in use, the frequency, as well as any CTCSS or DCS code. The percentage indicator at the top is a version of an S-Meter, although I'm not entirely sure what it represents.

full


One unusual thing I discovered is the location of the mic, toward the top right below the antenna. This approach is fine, but the user needs to be aware that it's in a different spot than on most HTs. Note the location in this picture, right below the removable SMA antenna.

full


The audio produced by the built-in speaker is very LOUD, but it does have a bit of a very slightly muffled quality which is normal for waterproof radios. I've certainly heard much worse on much more expensive radios. One thing that could use some improvement is the contrast of the display outdoors. Overall, the HA1G has a very nice, well thought out display, but it can be a bit difficult to read in the direct sunlight. This is a common problem with color displays on radios. This photo of the radio outdoors in the direct sunlight is a bit exaggerated by the camera aperture and white balance, but it illustrates the point.

full


Looking at the above picture, you can see that you can quickly access the most common radio parameters directly from the keypad via a long press. I found this to be one of the most useful features. You can also see in the photo above that the radio can display two bands at once. You can also toggle it to display / listen to only one band. Why would you want to have two GMRS bands active at once? Well, one use case is the built-in scanner. Using the free software, you can create scan lists which can be any frequency in the VHF/UHF RX coverage area. That's right, this radio will RX VHF frequencies as well. Here's an example where I programmed my local Police VHF frequencies into a Scan List that I use to listen on band B will using band A for GMRS TX frequencies.

full


BTW, I feel that the scanner itself is a little slow, but it's about the same speed as most radios in the price category. Another neat feature is the ability to create Zones, much like you might do with a commercial radio. This is especially useful if you travel; you could create different zones that represent the GMRS repeaters in different cities, for example. You can create 16 zones, with 16 channels in each zone.

full


In addition to the standard scan list and zones feature, you can create a special "Emergency" scan list / zone, complete with a specialized alarm if that frequency is heard.

full


full


Programming software is available from Retevis' website; I had no issues with the software. Even the USB driver for the cable was trouble-free; anyone with experience with these types of radios knows how challenging USB drivers can be. I found the software very easy and intuitive to use.

Overall, this GMRS radio has a ton of features that you normally see in Amateur or Commercial radios. It's built tough and easy to use and should be a strong contender to put into your arsenal if you are a GMRS user. At the time of this writing, the price is about $75 on Amazon:

Buy Ailunce HA1G on Amazon Here!

Mobile DX Rig

From KE4WMF
Let's have some fun in the mobile!

73
Jeff
Screenshot_20240127-180620~2.png
Screenshot_20240127-180828~2.png

Racing on the Air FAQ, Rules, and Tips

Racing on the Air is intended to be a fun way to operate ham radio at any type of racing event. Any type of formal racing event may be activated by any licensed ham, anywhere in the world. This is a fun, informal activity meant to promote ham radio and give new opportunities to make contacts at interesting events.

Here are the basics you need to know to participate:
  • Any type of organized racing event is eligible for activation. This includes auto racing events such as NASCAR, F1, Le Mans, IndyCar, NHRA. Horse Racing events, bicycle racing such as the Tour de France or Baker to Vegas qualify. Marathons, boat and airplane races are all included. Off road racing such as the King of the Hammers and Baja 1000 are included. Even your local Saturday night NASCAR track can be activated. Basically, if it's some type of formally organized racing event, you can activate it.
  • To notify others of your activation, make a new post in this forum section letting people know which event you intend to activate. Give some indicators of the dates, time, bands, and modes you intend to operate to help others find you.
  • You are free to edit your announcement if you need to update date, time, frequencies, modes, etc.
  • When calling, please use "CQ Racing on the Air" or "CQ ROTA" as the activity becomes more well known.
  • After the event, edit your original post and append your log of contacts. You can do this by attaching an ADIF file, a text file, or just posting the list of stations.
  • If your club already activates a race (such as the Indianapolis Motor Speedway), do what you already do and we would appreciate you making a post here and uploading the event log.
  • If you want to be notified of activations, be sure to subscribe to this forum section to receive emails.
  • Follow all local laws and rules related to Amateur Radio.
  • Be a courteous operator.
There aren't any awards for participating; this is for fun and bragging rights. We also want to see photos of the event, your station, and the racing, so please post them for us to see!

Jan 6, 2024 Trip to the K9KAO Repeater Photoblog

The K9KAO 440 Mhz repeater sits atop Sunset Peak in Southern California at 5200 feet, providing terrific coverage to the greater Los Angeles area. This last weekend, three of us took the trip up the mountain to do some much needed maintenance, including replacing the Motorola Quantar power amplifier and installing a new Wifi downlink dish. I decided to make a photoblog of the most interesting parts of the trip as well as the repeater site itself.

The first leg of the trip is a drive up to Mt. Baldy Village, which is at the base of the the Mt. Baldy Ski Resort. As you reach the village, you head west for a few miles before arriving at the dirt road that heads up to the repeater site. After a couple of years of heavy rainfall in SoCal, the road is in serious need of maintenance and it's basically now a Jeep trail. Much of of the trail is on the north side of the mountain which offers nice scenery and views of the taller mountain range to the north.

20240106_100824.jpg


Here's a shot looking to the north with a portion of Mt. Baldy at 10,000 feet visible to the right.

20240106_101123.jpg


The view up this trail is breathtaking and pictures just don't do it justice. Here's another image looking to the north showing much of the San Gabriel Mountain range.

20240106_101127.jpg


The last few weeks had a few days of light rain in the city and the temperatures in the mountain are low enough to bring a bit of light snow. I was still a little surprised to see snow on parts of this trail, though. The snow wasn't deep, but it was frozen and slick so being a bit cautious was certainly warranted.

20240106_101728.jpg


Eventually the trail winds around to the south side of the mountain as you start to get closer to the radio site. This is where the road starts to get a bit "fun". There are a bunch of spots like this:

20240106_102355.jpg


As we go up, the road gets narrower and we start to see the radio towers.

20240106_104128.jpg


A little farther and more towers appear.

20240106_104641.jpg


Now a few pictures off the good stuff. This is the vault and tower where our repeater is located.

20240106_104944.jpg


And here's a couple of shots of the tower itself.

20240106_105224.jpg


The receive antennas is shared by a couple of different repeaters housed at the same location and is at the very top of the tower, visible here.

20240106_113940.jpg


Coming around from a different angle, the transmit antenna is about half-way up the tower. In this shot, it's the massive antenna second from the left which extends through the pic.

20240106_113935.jpg


The first task was to replace the failed power amplifier. This repeater is one of the busiest in SoCal and it's not uncommon for it to be busy most hours of the day, every day. This type of duty cycle certainly puts a strain on the PA. Fortunately the effort to do this is just a simple module swap on the bottom left of the Quantar. In this shot, you can also see that we use an Arcom RC210 controller.

20240106_105528.jpg


Once that was done, it was time to replace the WiFi dish to reestablish internet service to the repeater. Here's Henry, K9KAO mounting the dish from the roof.

20240106_113043.jpg


We made bearing and azimuth calculations to the uplink site, so aligning the dishes only took about 15 minutes. All of the existing ethernet and wifi inside the vault was still working, so as soon as the dish work was done, internet was back online. Initially, this just allows us to control the repeater remotely, but we will soon be hooking it up to other services such as Allstar. Before we got off the roof, I took a 180 degree panoramic shot from the site to help provide an idea of the coverage. The Pacific Ocean is on the horizon.

20240106_114021.jpg


After lunch and a couple of cold beers, it was time to head back. Here's one more shot of the repeater coverage view from the road with the building to the left.

20240106_110833.jpg


The ride home was uneventful, but since it was now late afternoon, the new sun angle provided for additional opportunities for pictures of the scenery.

20240106_142043.jpg


One last pic, half way back down the trail.

20240106_142105.jpg


It's an 82 mile round trip drive which takes a while due to the trail time. On a clear day like this, the views are stunning, making the time fly. Now that winter is here, we'll have to be a little judicious about when we travel to the site, but that won't hold us back from adding new capabilities to the system in 2024. Hope you enjoyed the ride along!

Antenna tower as abstract art

This past weekend I visited the Nevada Museum of Art in Reno, NV. One of the galleries was sculptures by a guy named Cannupa Hanska Luger. I was surprised at the subject matter of this piece called The Keep, so I took a photo and copied the text to share. It's three stories tall.

1000003147.jpg


The Keep 2023

Lodgepole pine, California pine, abaca paper, and mixed media

Luger made this large scale sculpture from lodgepole pine trunks and a Western white pine tree that was previously growing on the museum's property, but which was removed during the museum's current expansion. The approximaetly twenty-five foot sculpture emulates a radio tower used to emit and receive faraway signals. As an instrument of communication, within a cargo cult context, it is built in the hopes of transmitting messages to the gods or ancestors to send more goods. Within, the context of the exhibition, however, the tower is intended to provoke critical questions about the nature of communication itself, and ask important questions about who is empowered to speak and whose messages remain silent.

Elecraft K4D Noise Reduction compared to BHI NR module

I've owned the Elecraft K4D for a while now. It's a wonderful rig. However, I am deeply disappointed in the NR capabilities on SSB and several have brought this up on the various Elecraft forums. Wayne N6KR, one of the Principals of Elecraft has commented that they intend to improve it by adding spectral subtraction algorithms, but for now it's basically a copy/paste of the code from the older K3 rig. I got tired of waiting around and decided to improve the situation by trying out the BHI Dual In-Line Noise Eliminating Module.

Because the Elecraft K4D has stereo speaker / headphone output (which is used in a variety of ways), it was important to me to buy this specific BHI box, which supports both external stereo speakers and stereo headphones. They can be used independently or together and even have separate volume controls. I shot a brief video doing a quick demonstration of both unit's NR capabilities, as well as using them both together. Note that I could have made additional adjustments on the BHI module, but I felt the demonstration was good enough as is. To keep the comparison on a level playing field, I made no additional adjustments on the K4 other than adjusting the volume as needed.

What do you think?

Retevis RA89 10 Watt Waterproof VHF/UHF Handheld Review

For the last couple of months, I have been extensively using a pre-release model of the Retevis RA89 10 watt VHF/UHF handheld radio. Now that the radio is fully released to market, I figured it was time to write a review.

full


The RA89 is marketed as an IP68 rated rugged radio. The IP68 rating means that it will survive being submerged in fresh water up to 1.5 meters deep for 30 minutes and is also dustproof. After the first few weeks of basic, everyday use, I decided to put the IP68 rating to an extreme torture test and put it in the Pacific Ocean surf, allowing it to tumble around in the sand and saltwater to see what happened. This type of test is well beyond what is expected by an IP68 rating and the radio survived just fine, even if it did take me a few days to get rid of all the salt and sand in every crevice. The video of this test is at the end of this post. This is a tough little radio; I have dropped it more than a few times on accident and it has survived the concrete, so far.

This radio follows the trend of other recent radios by incorporating a USB-C charging port, which I really like. Unlike another brand I recently reviewed, the RA89 will charge when connected to a PD port, even if it doesn't charge at max speed. In my opinion, this is well thought out because it allows you to use any typical USB-C charger or battery. The included 2500 mAh battery lasts a long time and is absolutely needed if you plan to transmit at full power for long periods of time.

Interesting Features

The Retevis RA89 covers all of the basic feature you find in similar radios, including frequency scanning, CTCSS and DCS scanning, PC programming, and FM radio functions. The radio has "dual watch", meaning it can monitor both A and B VFOs but it is not true dual receive; whichever VFO detects a signal first is the one that wins. It can also monitor for traffic while listening to the FM radio, which is nice. A recent firmware update added Mic Gain functionality which is very helpful. Interestingly, there is a RX DSP Noise Reduction feature which greatly reduces background noise on the incoming signal much like the type of functionality typically seen in HF rigs or DSP speakers. The NR feature is called "RX ENC" in the menu. Personally, I find it a bit too aggressive, but it is helpful under certain circumstances, especially longer range simplex operations. If you are going to use the noise reduction feature, you should probably turn off the Receive Saver (RX. SAV) because you tend to miss the first word or two of an incoming transmission. Unlike a lot of other radios in this price point, the antenna connects via a female SMA, similar to what is found in the Kenwood, Yaesu, or Icom radios. I prefer this because I can use other antennas that I already own, if desired. Lastly, the audio is LOUD, which is always a plus.

Transmit Power and Spectrum Analyzer Tests

As always, I tested the radio to see if it provides the advertised power output. The test setup is a fully charged battery fed into a Bird 43P with appropriate VHF and UHF 50 watt elements transmitting into a dummy load.

full


Both the VHF and UHF tests produced the same power output results: 9 watts on high, 5 watts on medium, and 2 watts on low power settings. Keep in mind that the Bird 43 has a full scale accuracy rating of +- 5%, so these test results indicate the radio delivers power output pretty close to as advertised.

Spec Analyzer tests are done using a TinySA Ultra by feeding the radio directly into the spec analyzer through an appropriate amount of attenuation to ensure the TinySA is not damaged. This is not exactly how the labs perform the tests for the FCC (they test using the supplied antenna in a fully RF quiet room), but it's still a decent way for us to test spectral purity.

Here's the 2m test; the transmit frequency is on the far left to easily show harmonics:

full


The 2nd, 3rd, 4th, and 5th harmonics are all significant, well above what would be considered acceptable by the FCC.

Here is the 440Mhz spec analyzer test:

full


These results look a little better but are still outside the FCC parameters. Retevis tells me that they are trying to obtain FCC certification for amateur radio service, so they're probably going to be forced to clean this up a bit if they're serious.

Overall, I'm happy with the performance of this radio. I've received no transmit audio complaints and other locals even think the goofy roger beep which can be turned on is "cute" :) It is certainly rugged and at a price point that is hard to beat. The programming cable and software provided worked flawlessly on my Windows 11 machine and CHIRP programming should be supported soon. The starting price of this 10 watt radio is currently $63 on Amazon; affiliate links are provided below if you're interested in purchasing.


Single Radio:
Amazon product ASIN B0CCNQT27K
Single Radio with Mic:
Amazon product ASIN B0CCNVRDBX
2 Pack:
Amazon product ASIN B0CCNX8JPT
4 Pack:
Amazon product ASIN B0CCNJ24JN

Retevis RA89 IP68 handheld radio torture test

Retevis send me their new RA89 VHF/UHF 10 watt handheld which is IP68 rated to test out. Being near the Pacific Ocean, I promised them a good salt water test. I don't think they had THIS in mind :cool:. More on this new radio coming soon...